If you love nail polish and love Valentine’s Day, this article is for you!
While yes, red and pink nails are common at all times of the year, they’re especially a favorite for Valentine’s Day! Red is the color of love, after all!
I’m not one to hit up the salon weekly for a regular manicure but I do DIY an at home manicure on the regular. I’ve been using Olive & June’s manicure system for years now and it’s made painting my nails a breeze and my nails look better than ever!
With that being said, I’m far from a professional manicurist but I do love to add a bit of fun to my nails from time to time.
Below you’ll find a variety of incredibly easy Valentine’s nails that literally anyone can do! Some may take a bit more practice than others while some can be done with no practice at all.
Tips for a Flawless at Home Manicure
Before we get started, here are some tips for having a flawless at home manicure every single time.
1. Wait 2 Hours After Washing
You want to paint your nails on the driest nails possible so wait 2 full hours after getting your nails wet (yes, even washing them!).
2. Tend to Your Cuticles
Push, never cut! Using your thumb nail, gently push back your cuticles on each finger. Using a buffer, gently buff your cuticles to get rid of dry skin.
3. Dip Your Nails
This is my favorite tip and makes such a difference! Oftentimes I’ve been touching my nails, getting them dirty or oily while I’m prepping them. Doing a quick dip in the polish remover pod will clean everything up for your first coat!
4. Let Each Layer Dry
Go SLOW! Don’t rush to put all your coats on as quickly as possible. Let them dry a bit between each coat before applying the next one. That will help you have long lasting manicures.
Pink & Red Valentine’s Nails
Let’s get to it! For the nails below, I used only Olive & June’s nail polish. I’ve noted which polish I used for each manicure in case you want to completely match them. I mostly used HD (white), ES (red), SCL (pink) and pink sands (light pink).
1. All Red
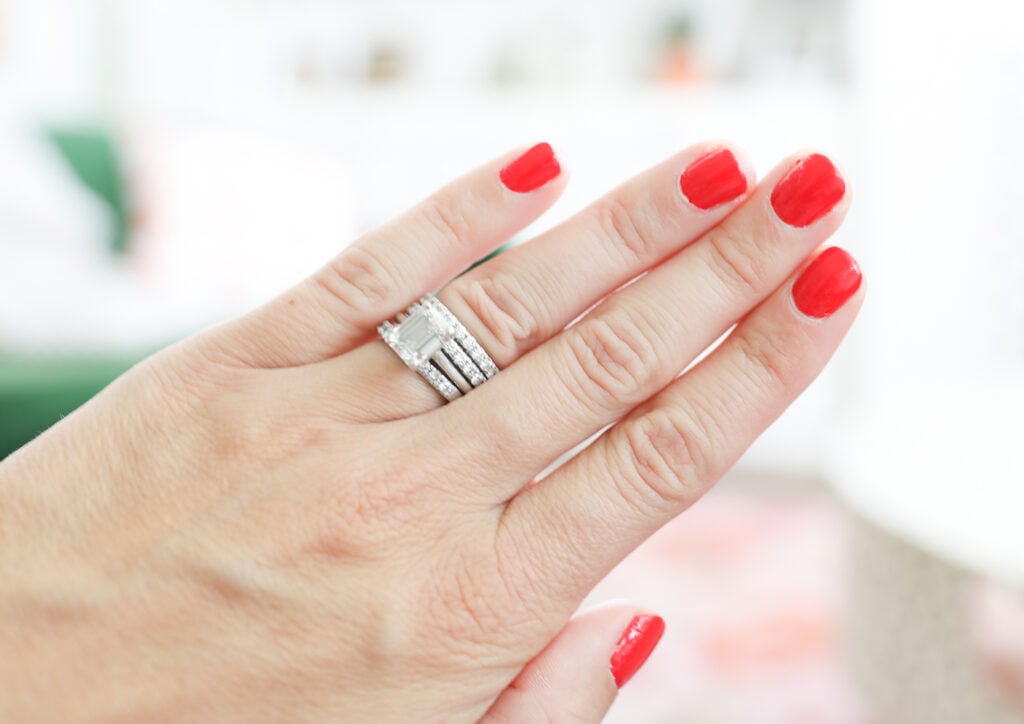
You can’t go wrong with an all over color red! I absolutely love this shade (ES) from Olive & June.
2. All Over Pink
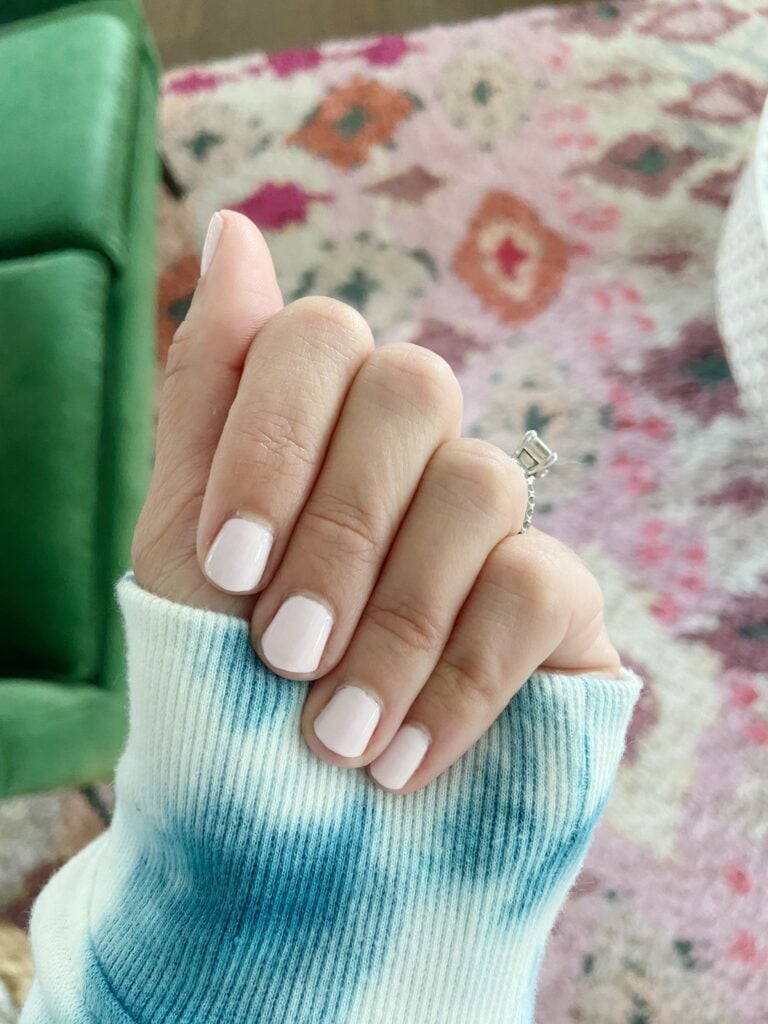
Prefer a pink over a red? Don’t want your nails to be super overpowering? I can work with that.
This subtle pink is a great way to get into the Valentine’s spirit without screaming “look at me!”.
This pink is “pink sands” from Olive & June.
3. Red & Silver Glitter Valentine’s Nails
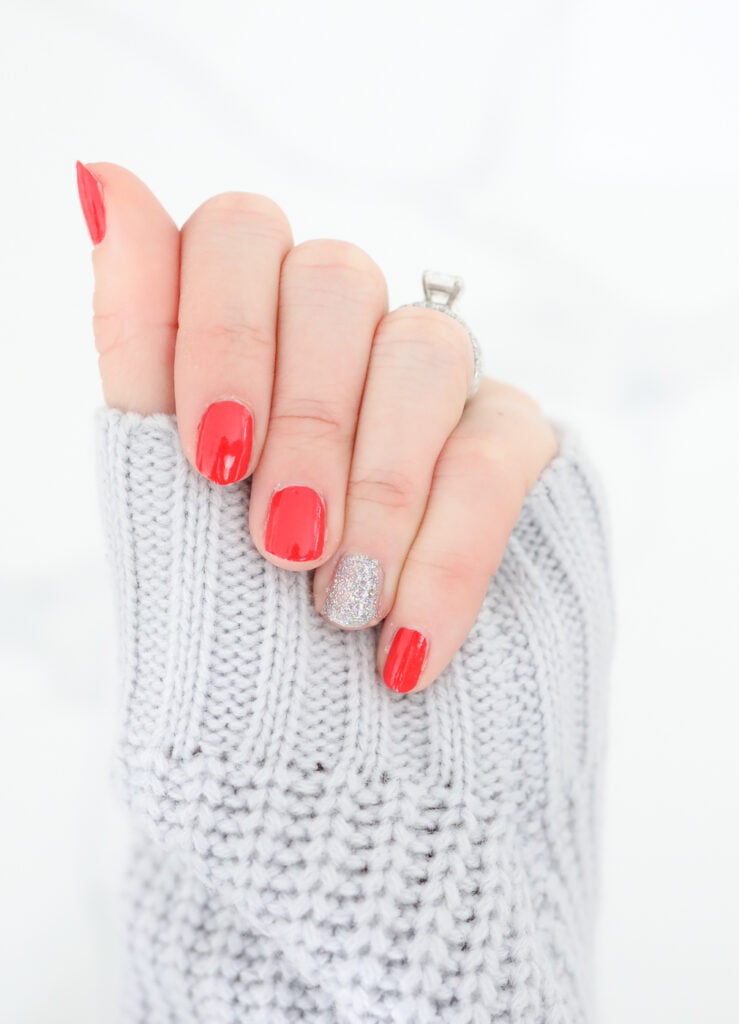
Add a little sparkle to your manicure with some glitter! Maybe you know you’re getting engaged and want a little added sparkle where your ring finger is or maybe you just love glitter!
Whatever your preference is, this all over red gets a fun little upgrade with swapping your ring finger red for pop of silver glitter.
The red is ES and the glitter is Exclamation Point (probably one of the best glitter polishes I’ve ever used!).
3. Ombre Pinks
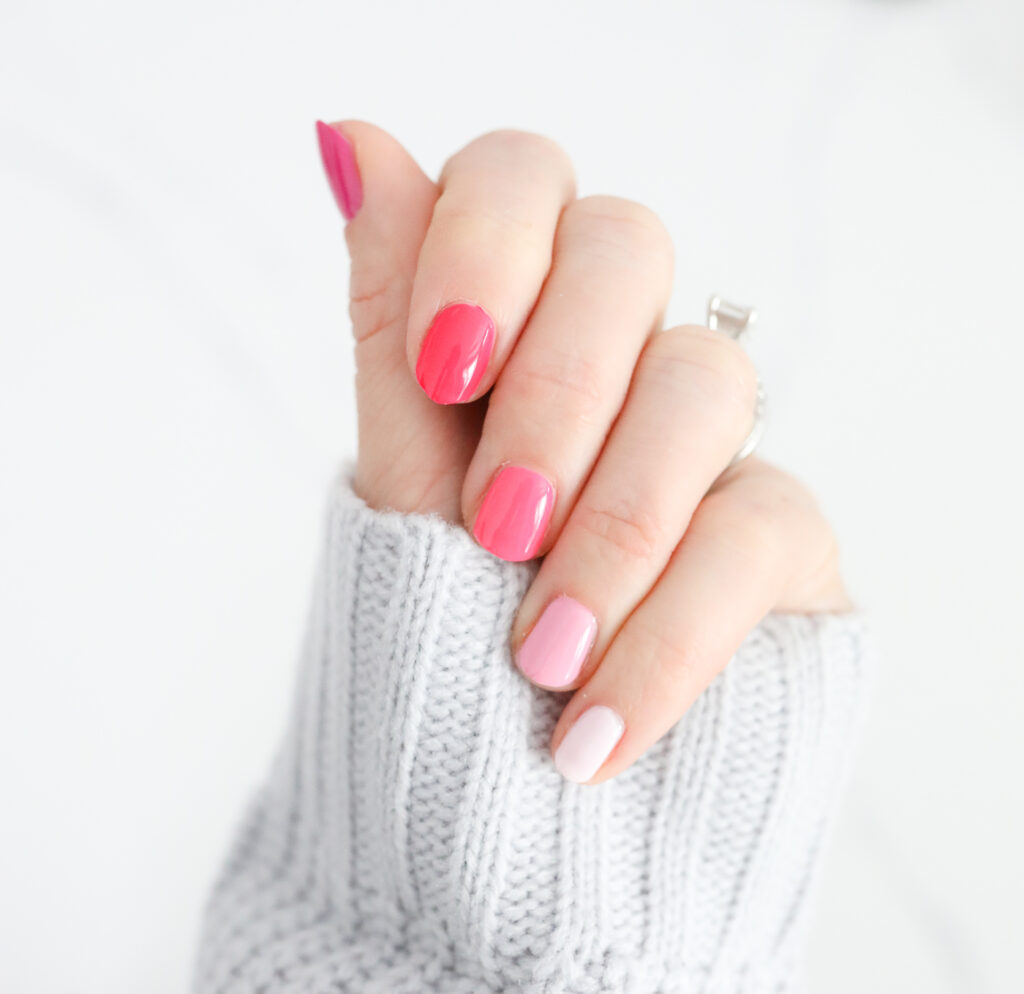
Can’t decide which pink to do? Do 5 different ones! Ombre nails are super popular right now so you’ll be on trend and ready to celebrate love with these nails!
The colors I’m wearing are Pink Sands, JM, Grateful & Kind, Hibiscus and Wild Orchid.
4. All Red With Pink & Red Heart Accent
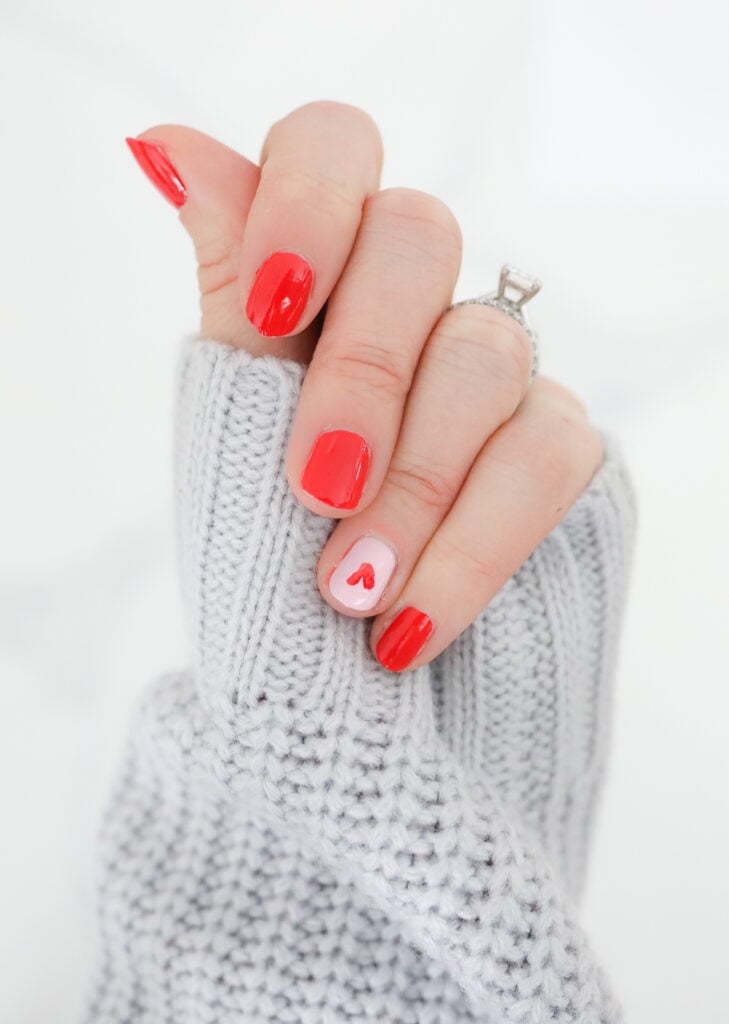
Yes you CAN do a heart detail on your nail! I promise it’s not as hard as it looks. You can try this out on a piece of paper to practice if you want – or just do it directly on your nail knowing you can easily remove it in the O&J’s polish remover pot!
Here’s how to do it. First, paint your nails a solid color. I used “pink sands” from Olive & June.
The best way I’ve found to do this is to take a round dotting tool and dip it in your polish. Then create three dots – 2 on top and 1 as the point. Next, using the same tool or a smaller tool (or even a toothpick), connect all the dots!
Just be sure to have enough polish on the dots that you can connect all 3 together.
Finish with a top coat and enjoy!
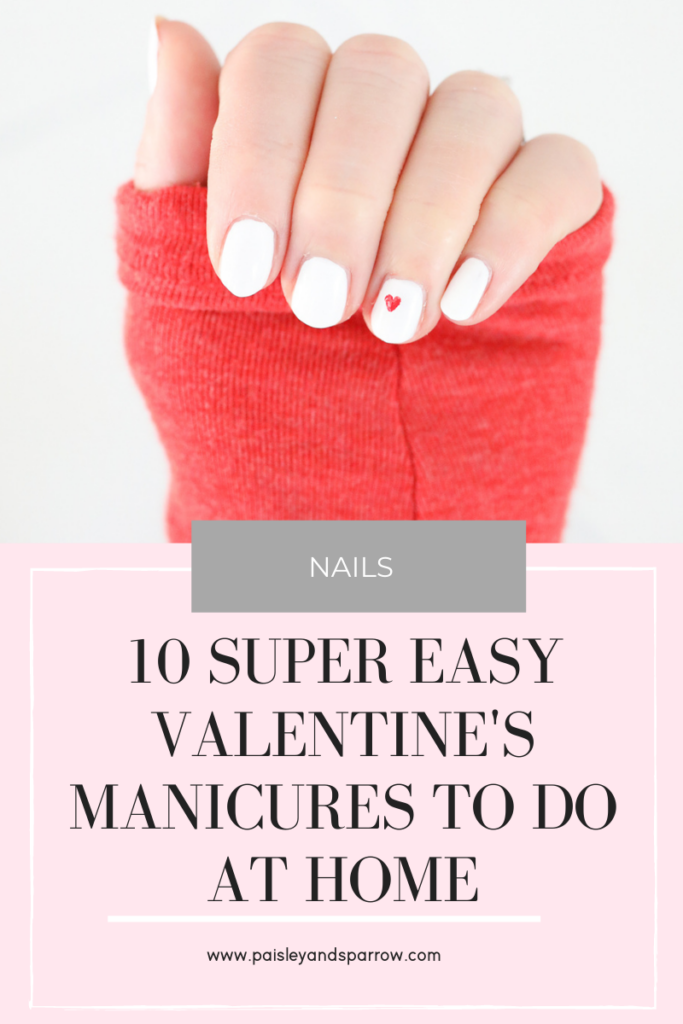
5. All White With Red Heart Accent
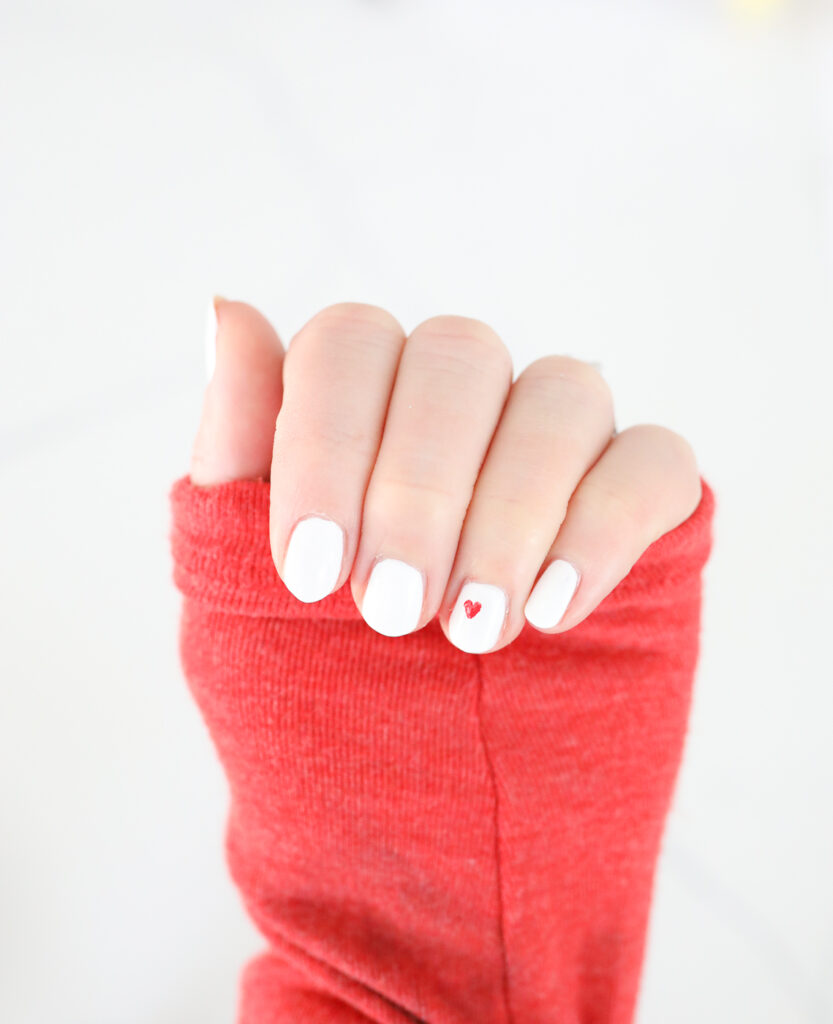
A similar look to the manicure above is this one! The only difference is this time paint all over your nails the same color and add a heart in a different color.
I love this look because it makes the little red heart pop! For this mani I use Olive & June’s HD (white) and ES (red).
6. Q-Tip Nails
New to nail art? Don’t have any of the brushes? No problem at all! This design is done using a q-tip!
All you need to do is first, paint your base color. In my case I used Olive & June’s ES.
Next, dip a q-tip into pink nail polish. Gently press it on to the base of your nail. You likely will need to do 2 coats of this.
Finish with a top coat!
7. Black & White XOXO Nails
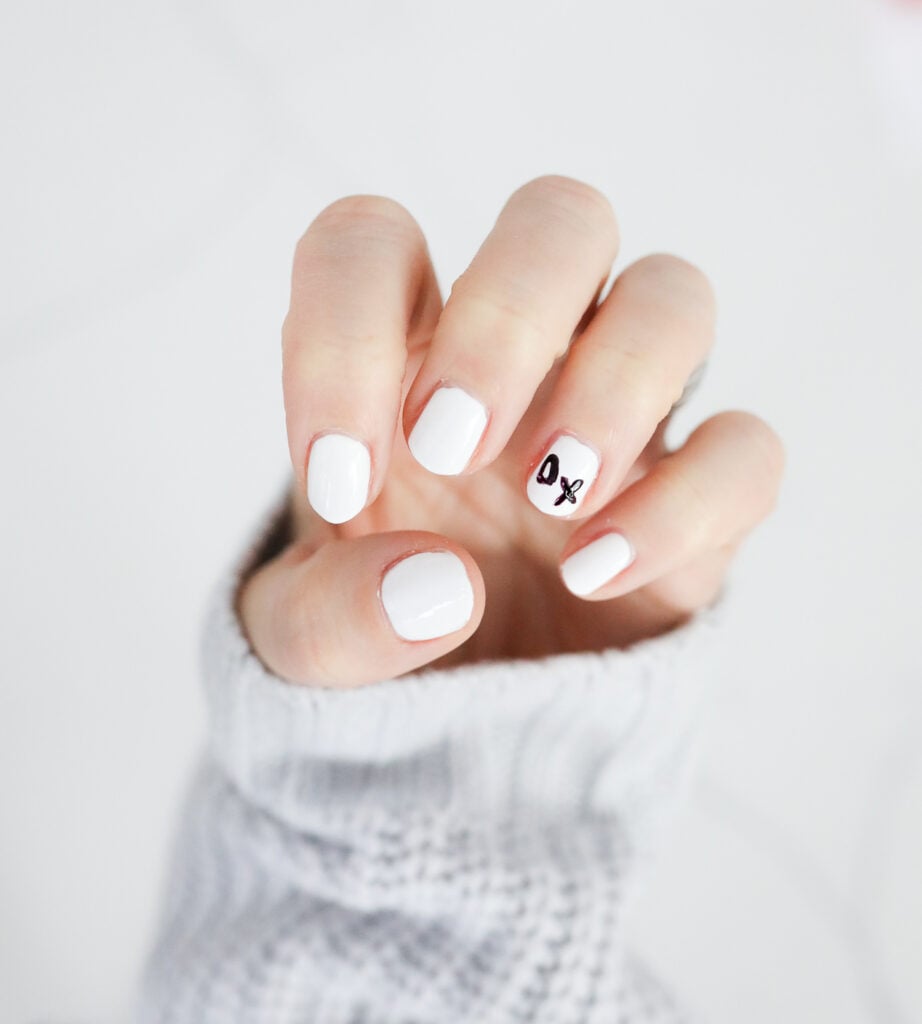
Ok, ok, I know this isn’t a red or pink manicure but it’s too cute to not include!
First start off with painting your nails a solid white. I used Olive & June’s HD. Be sure to let it dry completely!
Next pick a darker color than your base (you could easily do this with a red or pink!). Using a nail tool, carefully write out an “x” and an “o” on to one nail.
You may need 2 coats. Follow with your top coat!
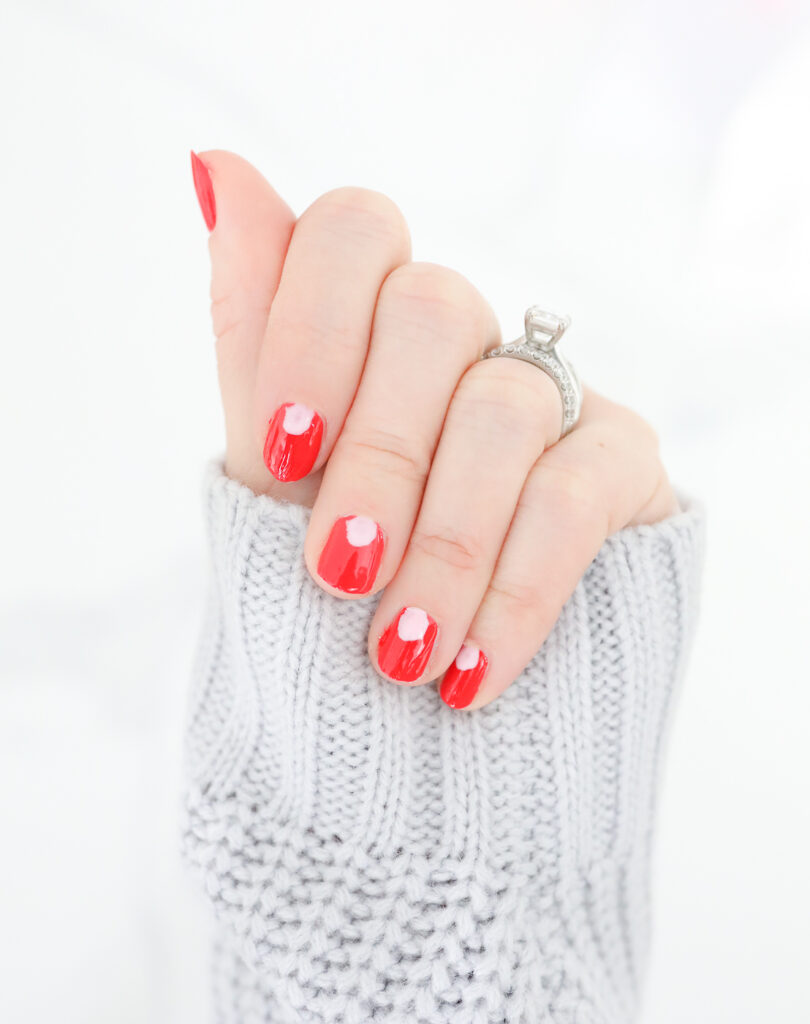
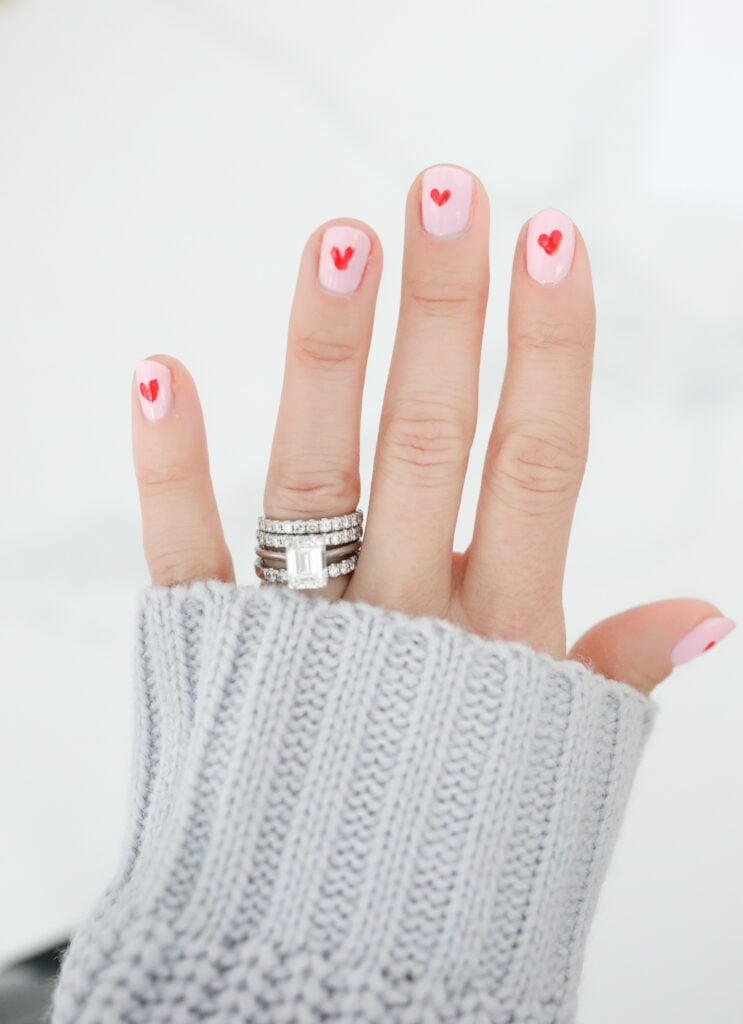
8. Pink & Red Heart Valentine’s Nails
This one is one of the most difficult nail arts to do since you’ll do every nail on both hands but trust me, after you do one or two nails you’ll get the hang of it!
First, paint your nails a solid color. I used “pink sands” from Olive & June.
The best way I’ve found to do this is to take a round dotting tool and dip it in your polish. Then create three dots – 2 on top and 1 as the point. Next, using the same tool or a smaller tool (or even a toothpick), connect all the dots!
Just be sure to have enough polish on the dots that you can connect all 3 together.
Finish with a top coat and enjoy!
9. Polka Dot Nails
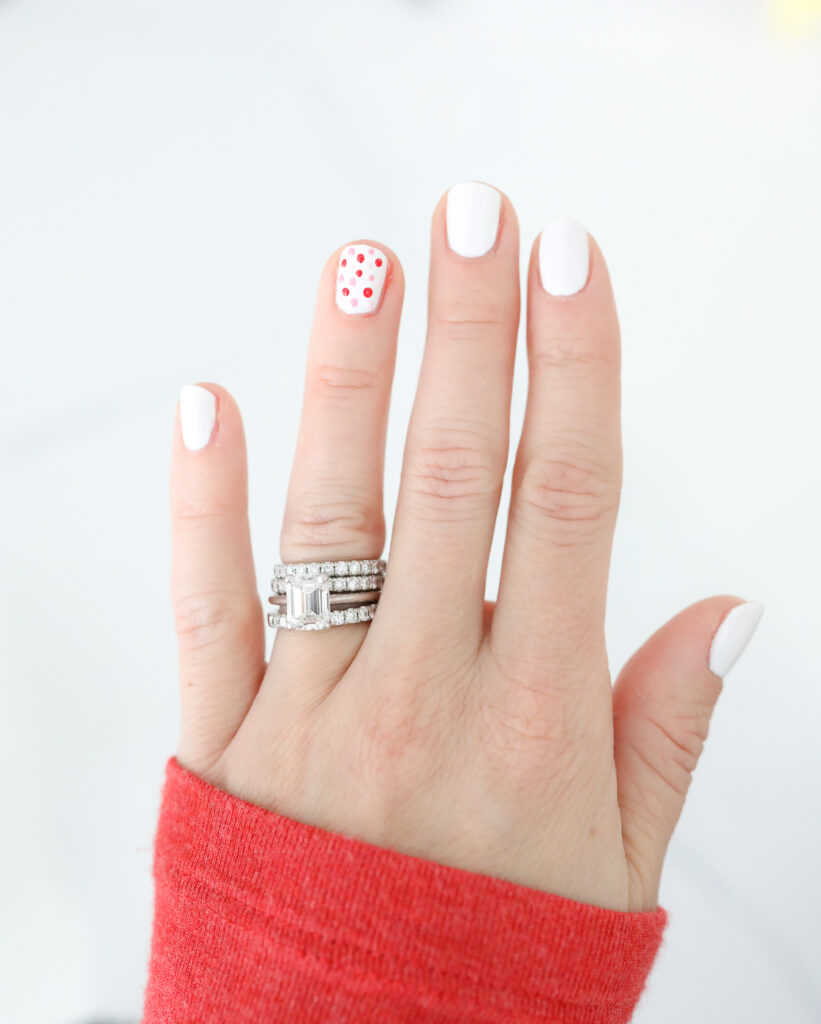
This one isn’t too hard but you do need to have some patience and be very careful when doing it!
First paint your nails a solid color. In this case I used Olive & June’s HD color. Let this dry completley.
Next, use a dotting tool, carefully dot on 3 different colors of dots on to your nails.
Again, allow this to dry all the way before putting on your top coat. The first time I did this I didn’t allow it to dry all the way and my top coat smeared all the dots!
I am wearing HD for the white and ES (red), JM (darker pink) and Pink Sands (lighter pink).
10. Squiggle Line Nails
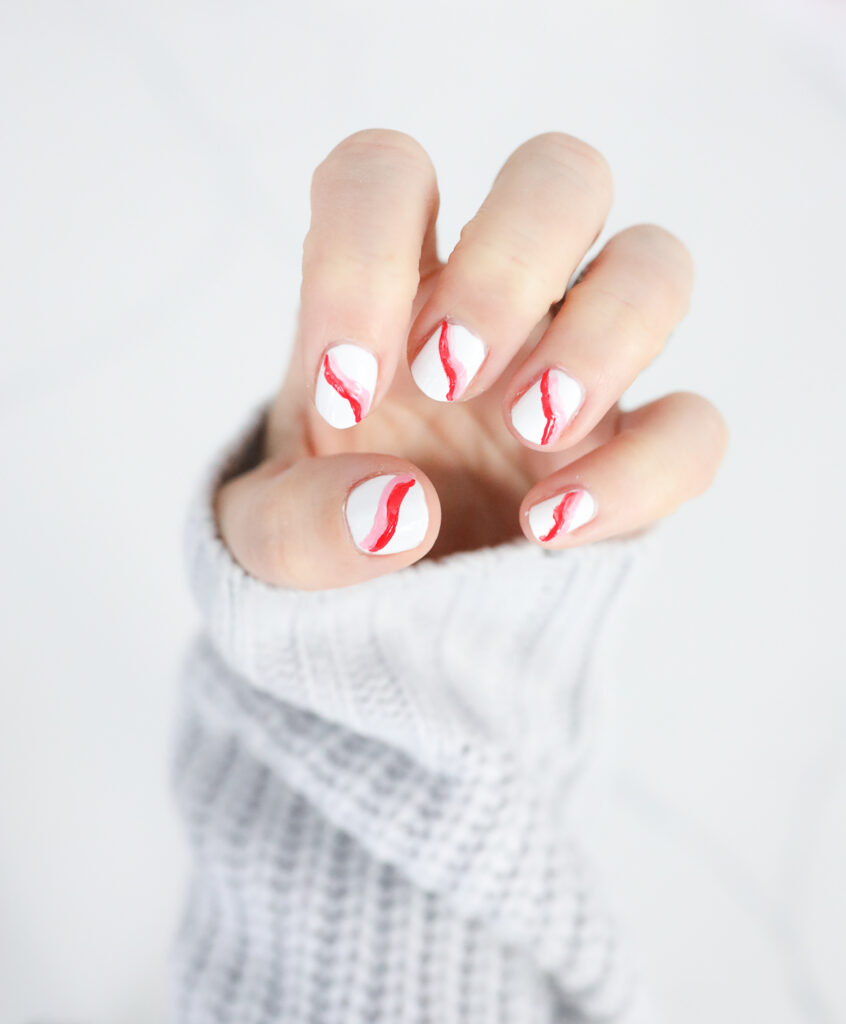
This nail art is a bit harder but it’s also sort of abstract and doesn’t need to be perfect at all!
To get this look, start with a solid color base like Olive & June’s HD.
Next, using a small nail brush, make a squiggle line from one corner down to the other corner.
Using a second color, carefully draw another squiggle line that follows the first line!
Follow with a top coat and you’re done!
The colors I used are ES (red) and JM (darker pink).
And there you go! These 10 super easy Valentine’s nails are incredibly easy to DIY at home. Some may take a little bit of practice but you got it!
All of these nails were done using Olive & June’s Manicure System and nail polish. I swear by their products! They make doing your nails incredibly easy.
You can find my full review on Olive & June here, which includes a 20% off discount code.
Happy Valentine’s Day!
Looking for nail ideas? Try these:
- Nude Nail designs
- Short Nail designs
- White Nail designs
- Floral Nail designs
- French Tip Nail ideas
- Black Nail Designs
- Ombre Nail Ideas
And try out one of these different nail shapes while you’re at it!