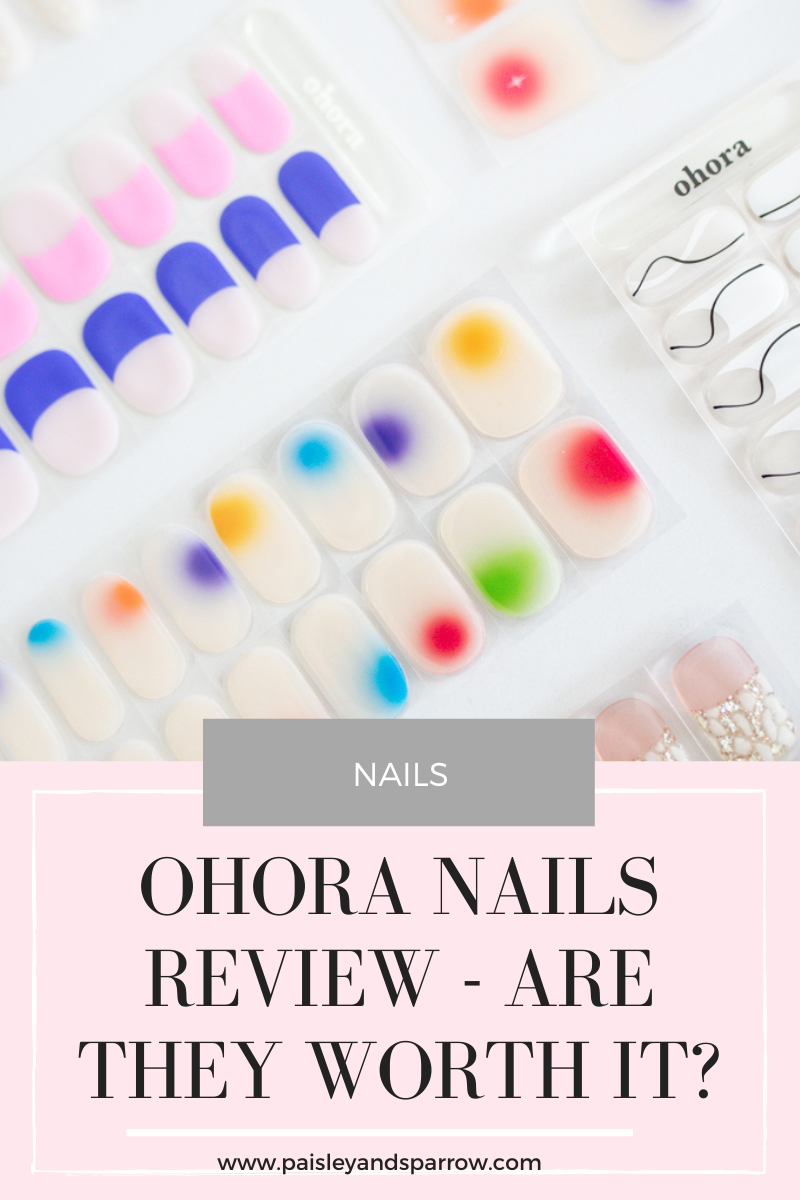
Hey nail ladies – there’s a FUN new nail brand in town! If you’re not into acrylic nails, need a break from going to the salon for fun designs on your nails or just can’t master painting your own nail art, let me introduce you to Ohora!
I was recently introduced to Ohora and want to share all the good (and not so good!) about this nail brand. I’ll also walk you through step-by-step instructions on how to use Ohora nails, highlighting the small issues I had and how to avoid them.
To start, Ohora did send me some product to try but this post contains only my own thoughts and opinions. Let’s get started!
This post contains affiliate links.
What is Ohora?
Ohora is the number 1 best selling gel nails in Korea and Japan. They were launched in 2019 and have sold over 20 million products since. Glamour Magazine named Ohora a top beauty innovator in 2022. They’re ranked number 1 in Amazon’s nail & wraps category and get an overall of 4.8 out of 5 star rankings.
Ohora was created to give you salon-like quality nails that are easy to apply at home or on the go. They created the first semi-cured nail strips on the market, starting in Asia and slowly making their way to the United States.
The Ohora technology is patented and each nail strip is triple layered with a top coat, color and base. They use safe materials that are ISO quality certified and safe ingredients that are toxin-free. These nails usually last 10-14 days when properly applied.
How Does Ohora Work?
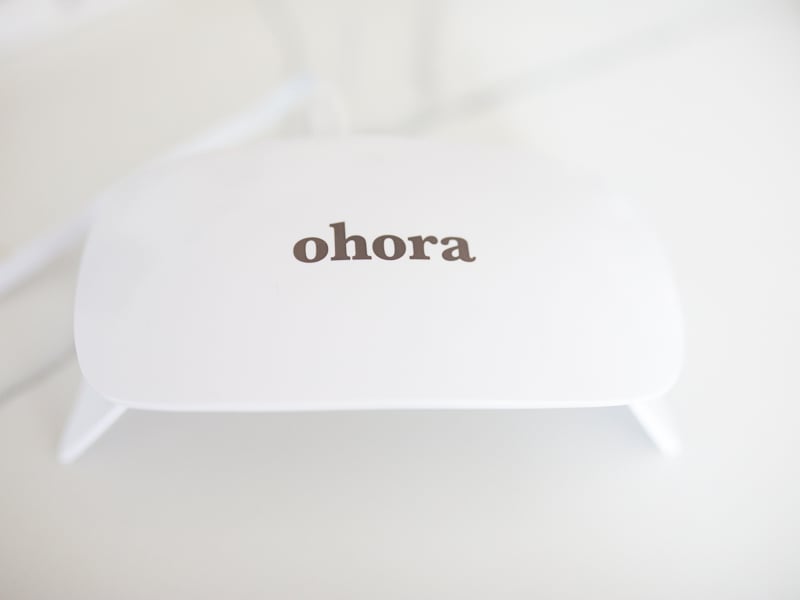
Ohora nail strips are 60% semi-cured, jelly-like strips. They’re bendable and stretchable so they can easily fit your nails. Once they’re applied, you use a UV lamp to fully cure them. This will harden the nails to look and feel just like the gel manicure you would get nail salons.

My Ohora Review
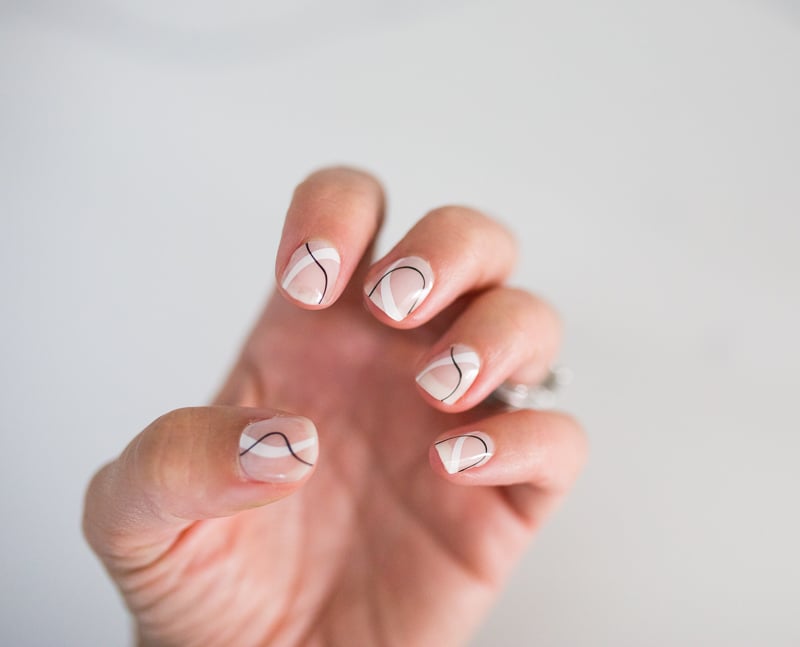
As someone who LOVES doing my nails but has never really mastered really great nail art, I love these! It is so easy to get a stunning manicure with a fun nail design in no time flat. There are tons of options and Ohora is constantly coming out with new styles and designs.
I also am not a big fan of acrylic nails because I don’t like how they feel on me but these aren’t like that at all! They look and feel just like a regular gel polish which I love.
It took a few times to really master getting them on, but after a few sets I feel like I got the hang of it. It took a few times to really master applying them to make them look natural. Finding the right size is super important so take the time to ensure you’re using the right size. Opt for a smaller size instead of a too big size because you can stretch the nail across your nail.
The first time we applied them, a few nails started coming off after 2-3 days. We learned it is super important to use the wooden dowel to press the nails down onto your nail bed. When we did it properly I had to remove mine after 7 days because I wanted to put new ones on!
Also be sure to press down the ends. If you don’t do that, there can be a slight gap. That got annoying when I was doing my hair or my daughter’s hair because the hair would slide into the gap and get caught.
Let’s go over some pros and cons:
Pros
- Easy to put on
- No down time after applying
- Lasts longer than a regular nail polish (around 10-14 days)
- More affordable than a trip to the nail salon
- Easy to remove
Cons
- Not all designs are good for short nails
- Slight learning curve for application
- More expensive than a bottle of nail polish (but less expensive than going to the salon!)
So would I recommend it? 100% yes!! I have done multiple rounds of these and love every one. I have even done it with my teenage nieces and they were just as obsessed (if not more obsessed) than I was! This is going to be a great gift for them and a regular manicure for myself!
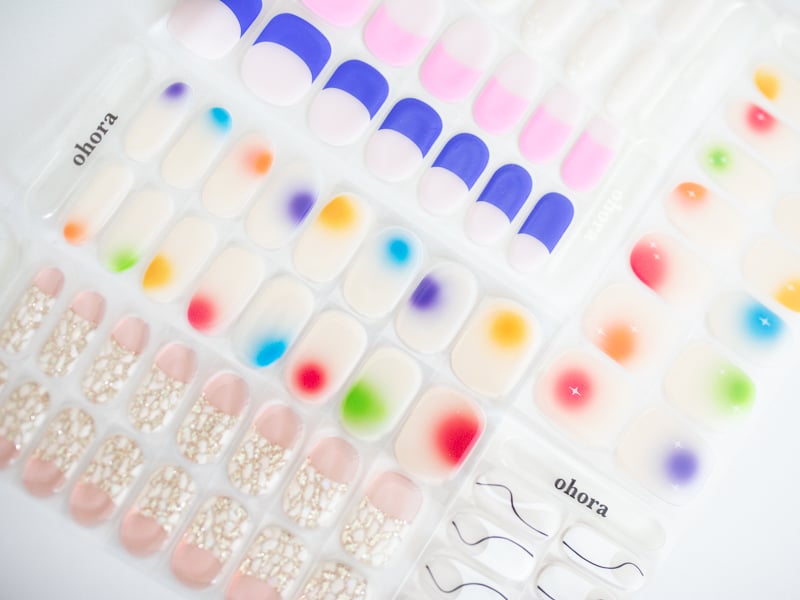
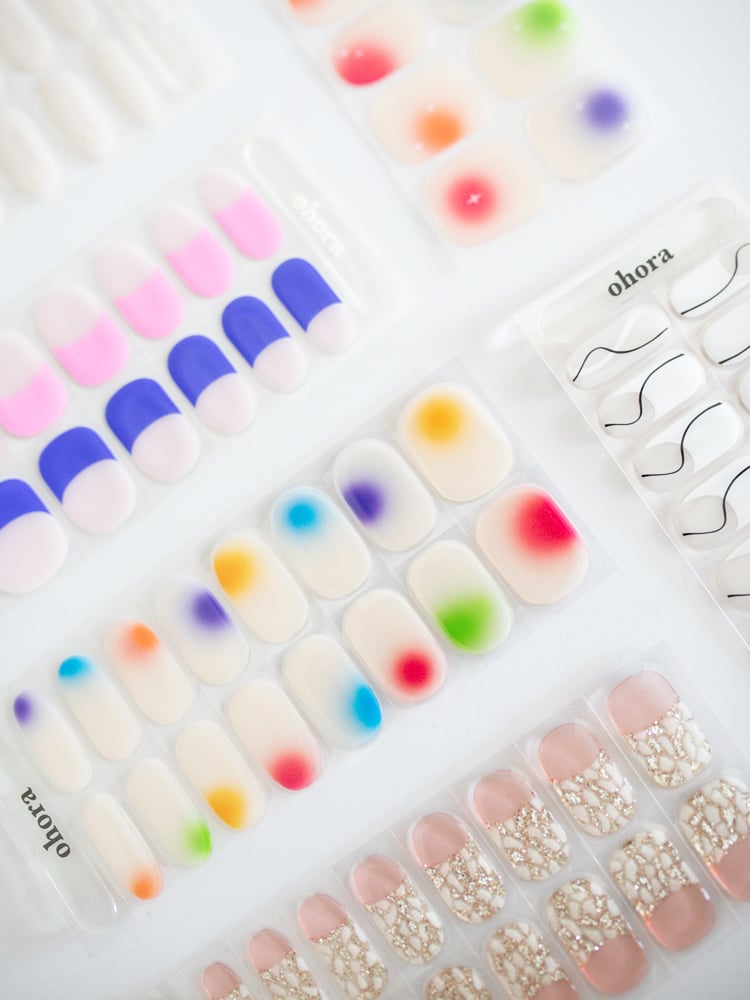
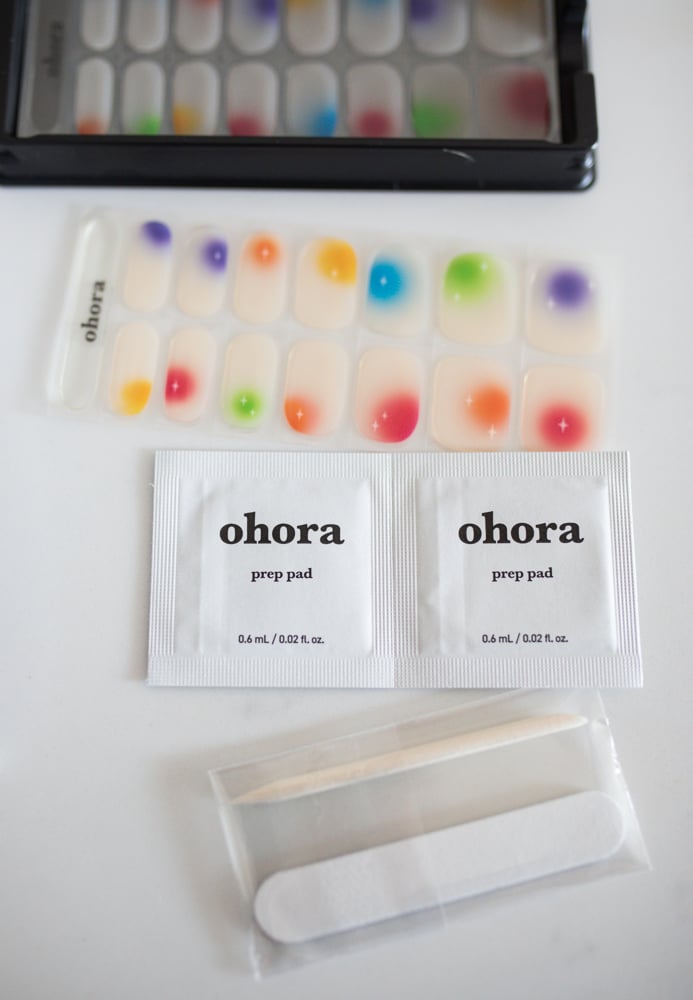
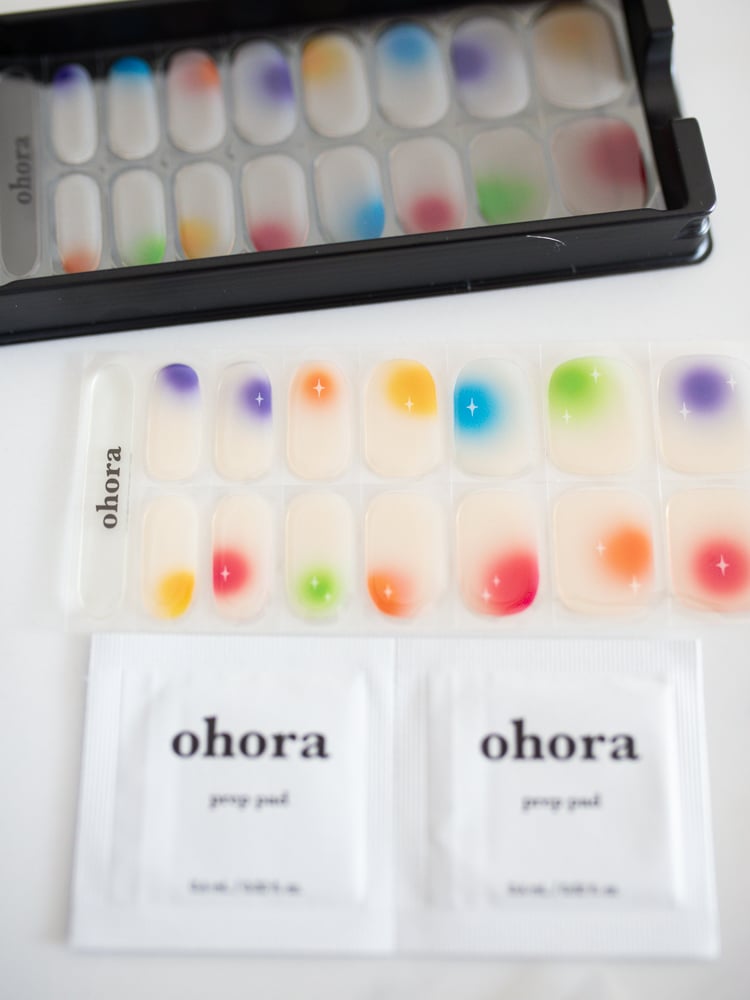
Contents in the Box
In each set of nails there are:
- 2 prep pads
- small nail file
- wooden stick
- 30 wraps in 15 different sizes
How to Apply Ohora Nails
It’s fairly easy to apply these nails although it did take me 2 rounds of application to really feel like I got the hang of it. Here’s how you do it.
1. Push Back Cuticles.
I found that pushing back my cuticles with my thumb nail made it easier to apply the nail strips close to my nail bed (and make it look nicer).
2. Remove Oil and Moisture
Just like when you’re painting your nails and you should always dip your nails in the nail polish remover pods before painting, you need to do the same when applying these nails!
Removing excess oil, dirt or moisture helps the nail strips stick better to your natural nails. Using the alcohol pad that is included, wipe your nails clean.
3. Pick Your Nail Strips
Each nail kit comes with 30 nails in 15 different sizes, making it easy to find the ones best for you.
Before you remove any of the nail strips from their paper, hold them up to your nails to determine which will fit the best.
It’s best to go with a nail that’s slightly too small rather than one that’s slightly too big. These semi-cured gel nail strips are stretchy so you can fairly easily stretch them to fit to your nails.
4. Apply the Nail Strips
First you’ll want to peel of the transparent film sheet that is covering the Ohora gel nail. Then you can gently peel pack the nail and apply it to your natural nail. Be sure to check the sheet to know which side is closest to your cuticle line.
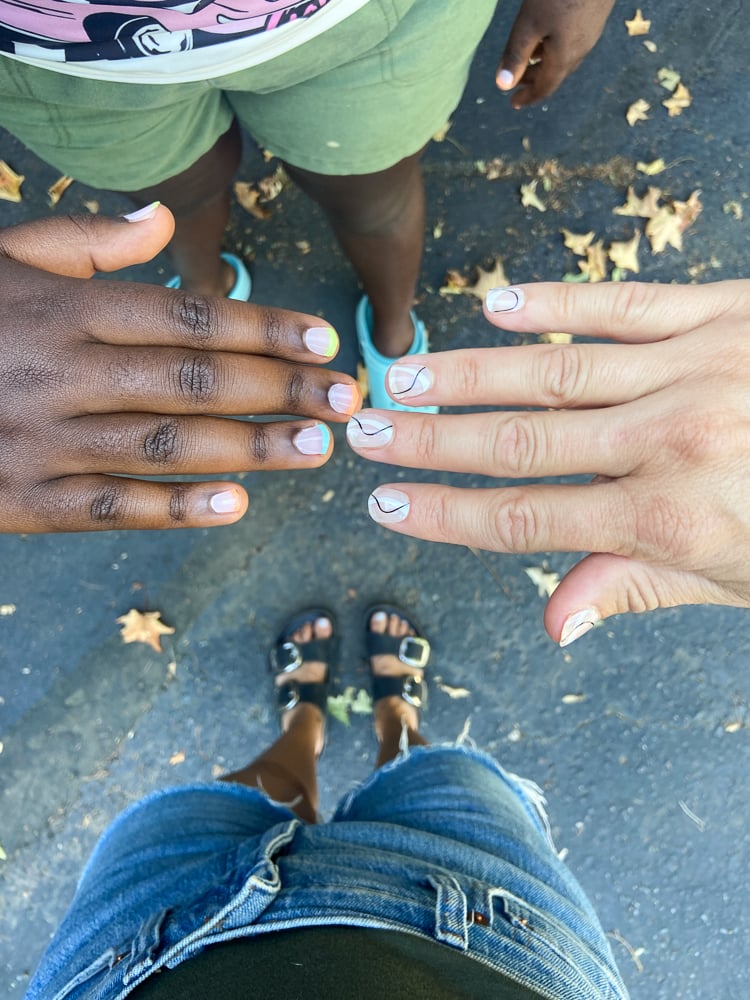
I like to start on one side and then stretch it over the other side to get a perfect fit. Another thing to note – some of the french tip styles won’t show the french tip if you have short nails.
My niece wanted to apply the neon french tips to her nails so we trimmed down the part closest to her cuticle so you could see the color of the tips. It’s fairly easy to do, you just need to make sure you cut it similar to the look of your nail bed!
5. Press and Smooth
Use your other hand to the press the nail strip down and smooth it over your entire nail to get it to firmly stick on your nail. Pay extra attention to the area along the free edge and use extra pressure there.
This will help prevent any snagging. The first time I put them on I didn’t focus on the tip and they snagged my hair which was super annoying! Be sure to put extra pressure on the tips.
6. Trim the Gel Strips
Now you need to trim back the gel strips so they are close to your natural nail. Since I have short nails I use a nail clipper to do this. You can also use a nail file or scissor to do so.
After you trim it use the wooden nail stick to smooth the strip along the edges and sides of the nail one more time for safekeeping.
7. Cure the Nails
Using the Ohora Gel Lamp, place your fingers under the lamp and push the button on the side. You’ll want to do this 1-3 times.
I typically do this at least 2 times, sometimes 3 to ensure it cures completely. You’ll know they’re done because your nails will be hardened and usually more shiny!
The last thing you want to do is overcure your nails, which will make removing them much harder than it needs to be.
8. File Your Nails
Lastly, file your nails! Smooth the edge of your nails to make them look natural and extra gorgeous. Then your left with luxurious gel nails!
If you have some of the Ohora semi-cured gel nails with a gem on it, do the same steps as above but before you apply the main nail strip, apply a clear protective strip first. You’ll also want to ensure you smooth out the area all around the pearl gem so no air bubbles get trapped.
How to Remove Ohora Nails
Removing the nails are super easy! All you need to do is dip the wooden stick included in your nail kit into nail polish remover or acetone solution. Gently push the stick under the nail strip. Keep dipping the stick into the acetone and repeat the process until your nail detaches.
Then use your acetone solution to wipe away any remaining adhesive. It’s really simple!

Where to Buy
Best part about Ohora is you can buy them on Amazon! You can also buy them directly on the Ohora website. Both are great options!
I hope this Ohora nail review helps you in deciding if they’re right for you. If you want to check out other nail reviews, check out my Olive & June review or my Olive & June Press On Nail review!