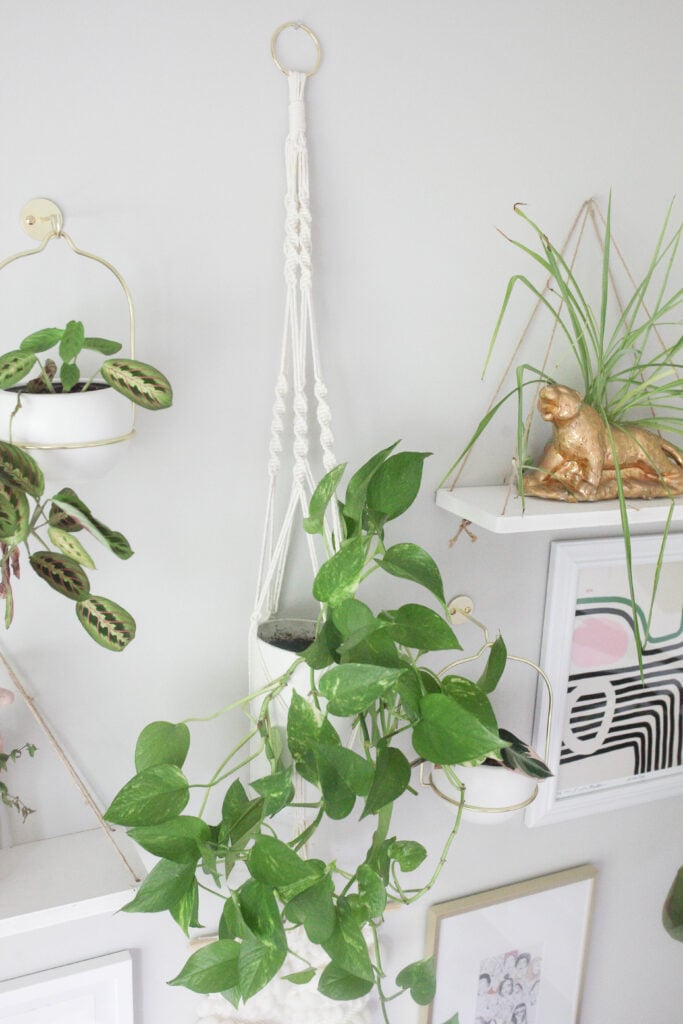
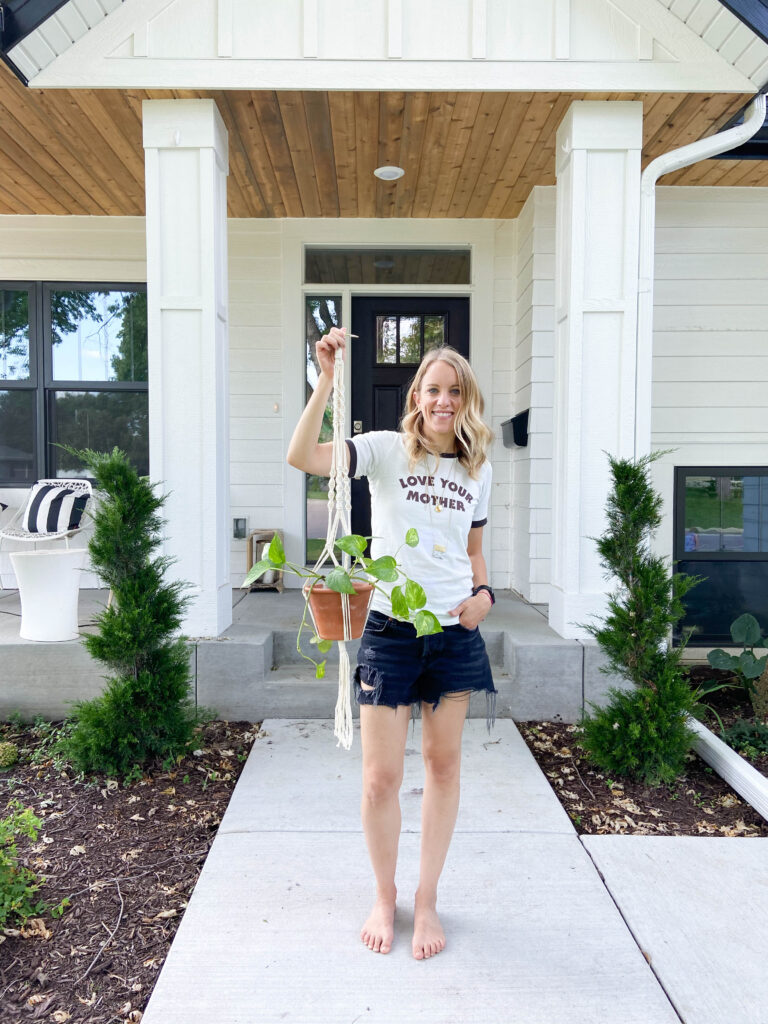
Plants are the perfect way to add some life and green to your home. And while setting pots on shelves or plant stands is great, why not try a simple macrame plant hanger DIY? It’s a fun, easy way to hang your plants from the ceiling or on the wall!
Macrame is making a big comeback and I can totally see why! It’s inexpensive, easy to use for a variety of crafts and once you understand a few different types of knots, the options are endless as to what you can do or make. Not only can you make some really fun macrame plant holder but you can try your hand at a wall hanging too!
I’m going to walk you through a simple macrame hanger tutorial to show you how to make not only the plant hanger shown on this post but also some easy ways to switch things up to fit different pots or your own style.
I have both step-by-step instructions as well as a video tutorial to help make this tutorial as easy as possible. Some steps are easier to understand through the video while others are better in photos. I recommend beginners use both to make your first macrame hanging planter!
Print off these instructions for an even easier follow along. After you complete your first hanger, you’ll likely just need to use this as a reference.
Paisley + Sparrow is a participant in the Amazon Services LLC Associates Program This post may include affiliate links which means I may earn a small commission if you shop using the links below at no additional cost to you.
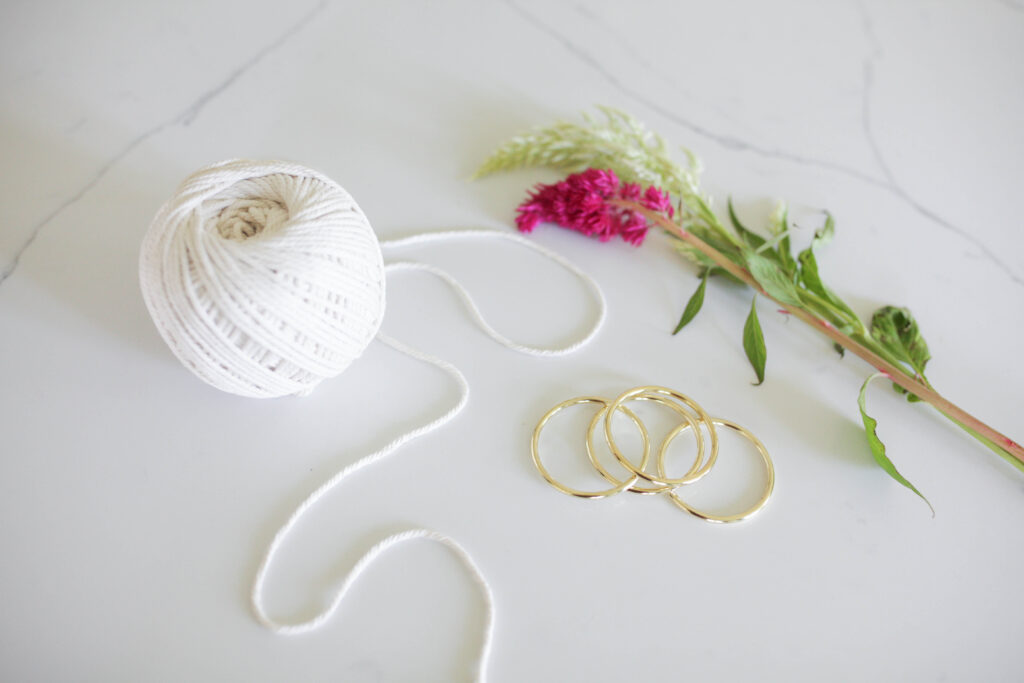
First let’s start with what you’ll need:
What supplies do I need to make a plant hanger?
- Macrame cord. Eight pieces 12 feet long and two pieces 4 feet long. I got this macrame cord from Amazon and we were able to make three plant hangers from it. You could also use different colors of cotton cord for a more unique look.
- A ring. I used this 2″ ring from Amazon – either 2″ or 3″ rings work great.
- Scissors.
- A pot.
You’ll also obviously want a plant to hang in it when you’re done! I love pothos in water since they’re easy to maintain, can survive in low light and are viney so they’ll hang super nice.
How much does a DIY macrame plant hanger cost?
I made three diy macrame plant hangers from the materials I bought. Here is the breakdown (the price has actually gone down since I made mine!):
- Macrame cord: $6-$10
- Metal Ring: $5-$7
The cotton cord was long enough to make three plant hangers and I have one left over brass ring.
Combined the cost when I purchased the macrame materials was $16.13 but divided by three it was only $5.38 per plant hanger. You can make three and give two away to a plant lover in your life if you don’t have room for three hanging plants! 😉
Also take the cost of the plant and pot into account if you don’t already have one on hand!
Macrame Hanging Planter Instructions
Macrame Plant Hanger DIY
A simple Macrame Plant Hanger DIY tutorial!
Materials
- Macrame cord - 8 pieces 12 feet long and 2 pieces 4 feet long
- Ring
Tools
- Scissors
Instructions
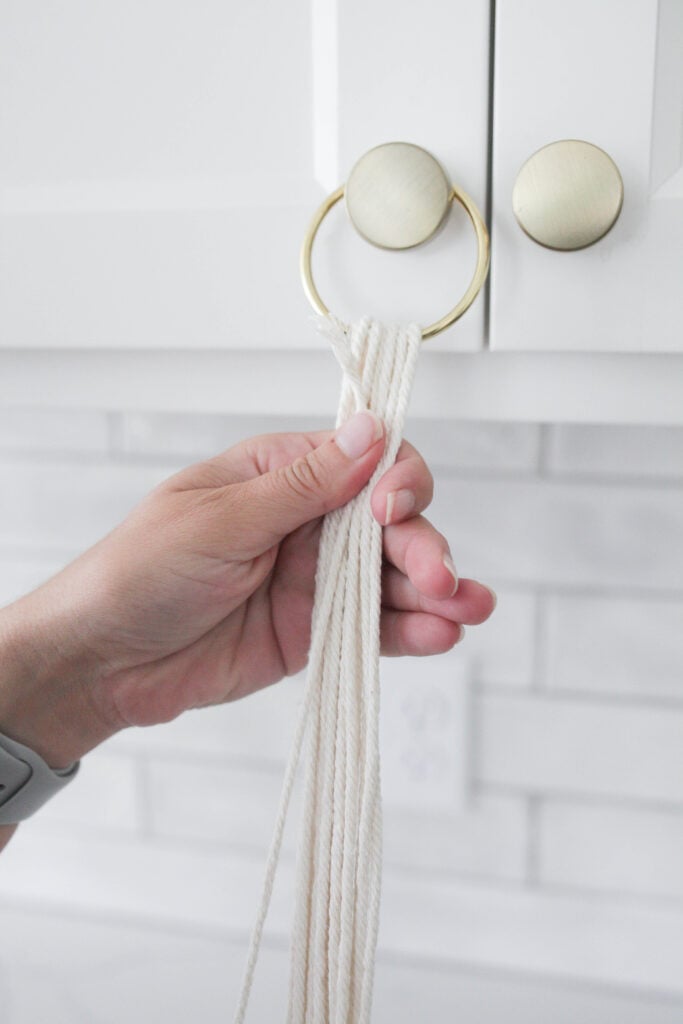
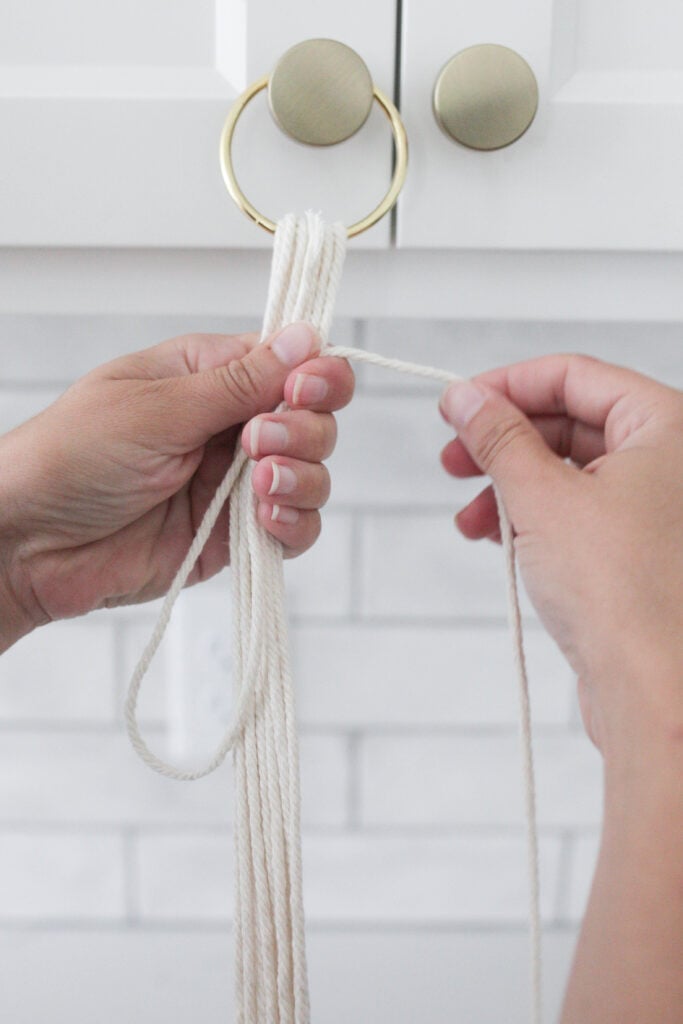
- Loop all 8 of your 12 feet cord through the ring so they fold in half at the center of the string.
- Create your gathering knot.
Using one of the 4 feet pieces of string, have one end of the string facing up toward the ring
- Then you'll want to create a small "u" shape with the cord leaving a nice long tail.Wrap the tail tightly around the "u", making as long of a wrap as you want! Once you have as long of a wrap as you want, take the end of the tail and thread it through the loop. Then take the top tail and pull it tight, cinching up the loop! Pull it so it's nice and tight and so the knot goes behind the wrapped part. Trim off the extra threads and the top is done!

- 3. Separate the 16 cords into groups of 4.

- 4. Add square knots to the top.

Here's how to do a square knot.
- Bring the left cord over the middle 2 cords.
- Take the far right cord and bring it over the left cord.
- Then tuck the right cord under the middle 2 cords.
- Lastly bring it up through the loop on the left side.
- Then you're going to do the same thing but starting with the right cord.
- Bring the right cord over the middle 2 cords.
- Take the far left cord and bring it over the right cord.
- Then tuck the left cord under the middle 2 cords.
- Lastly bring it up through the loop on the right side.
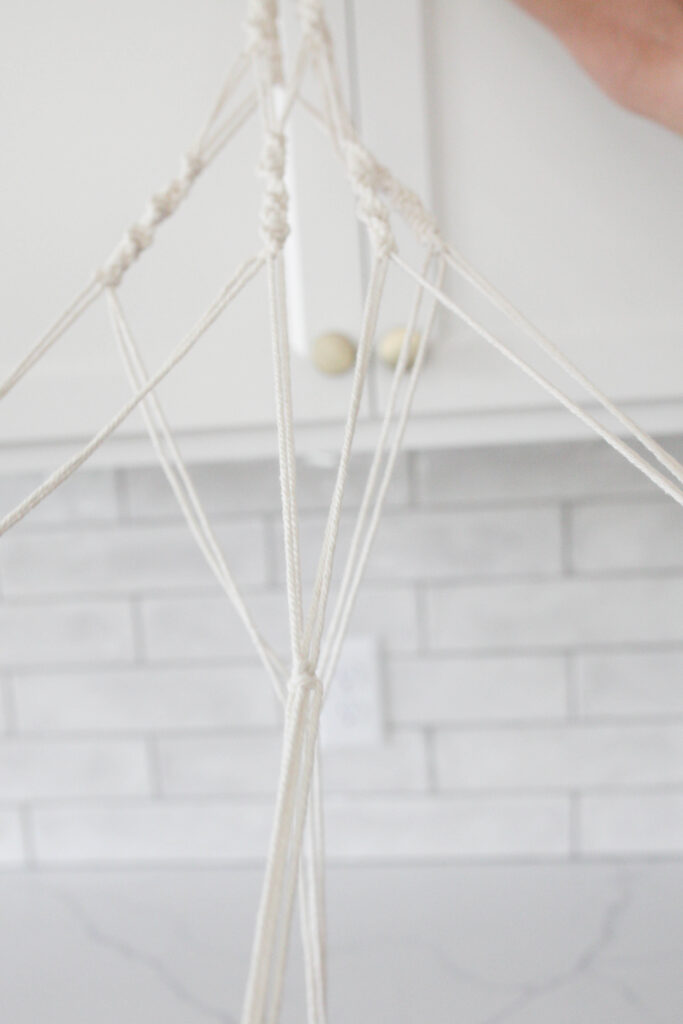
5. Create a section of half square knots (to make a spiral) 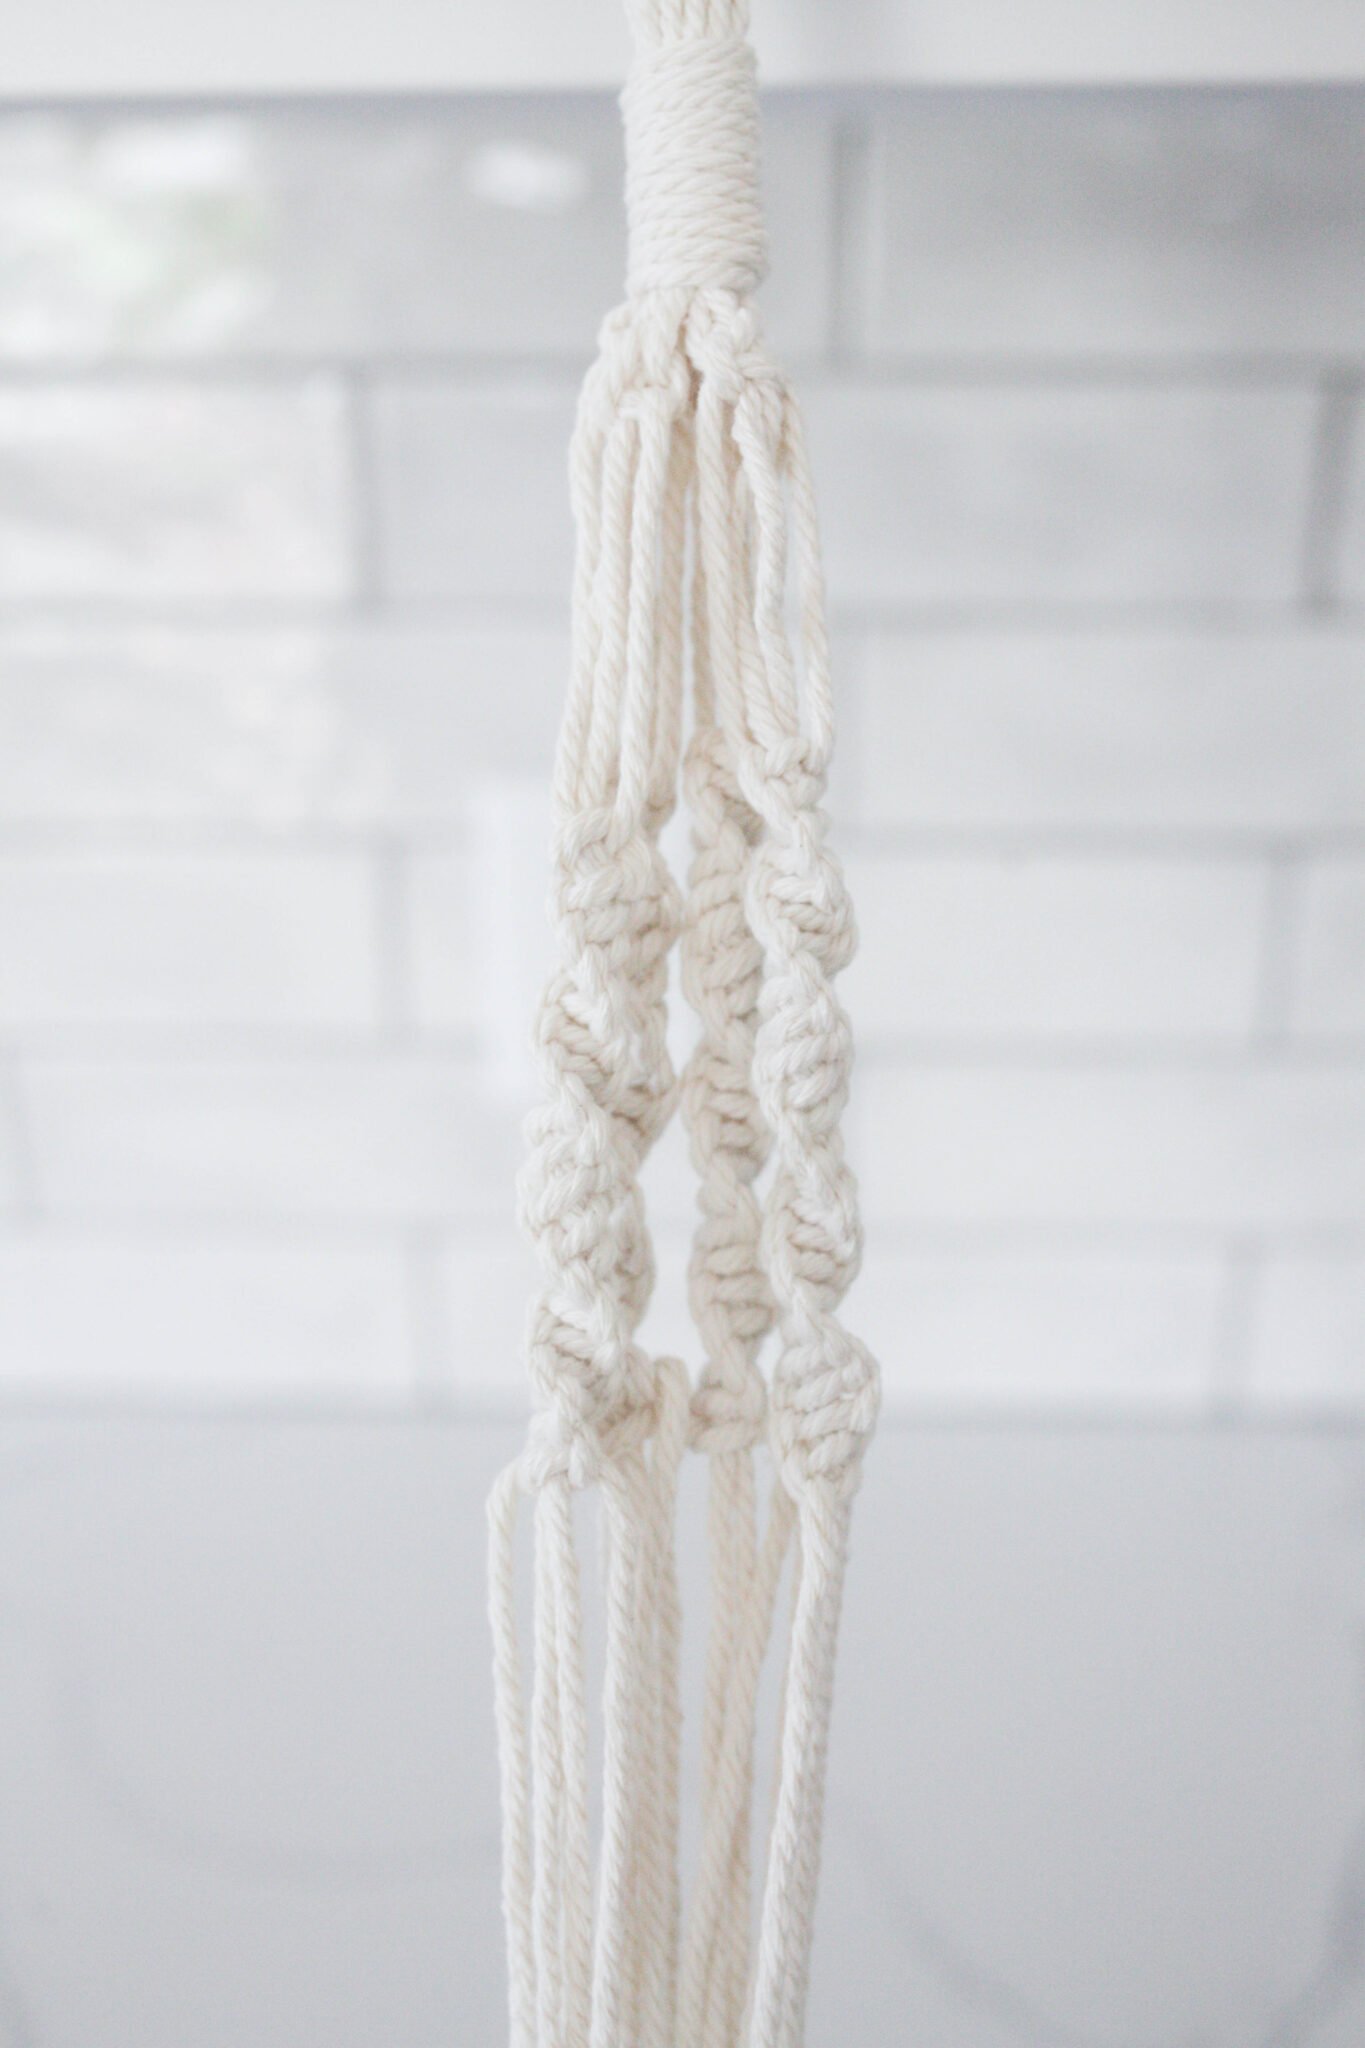
Then a few inches below the top square knots, do a few knots of half knots. This will create the spiral look. (If you want a straight look do full square knots.)
6. Create another section of half square knots (to make a spiral), this time combining sections. 
From there, we combined the strands. Take 2 groups next to one another and perform the same half knot you performed above to create another spiral section. (Again, if you want this part straight you'll want to do the full square knot.)
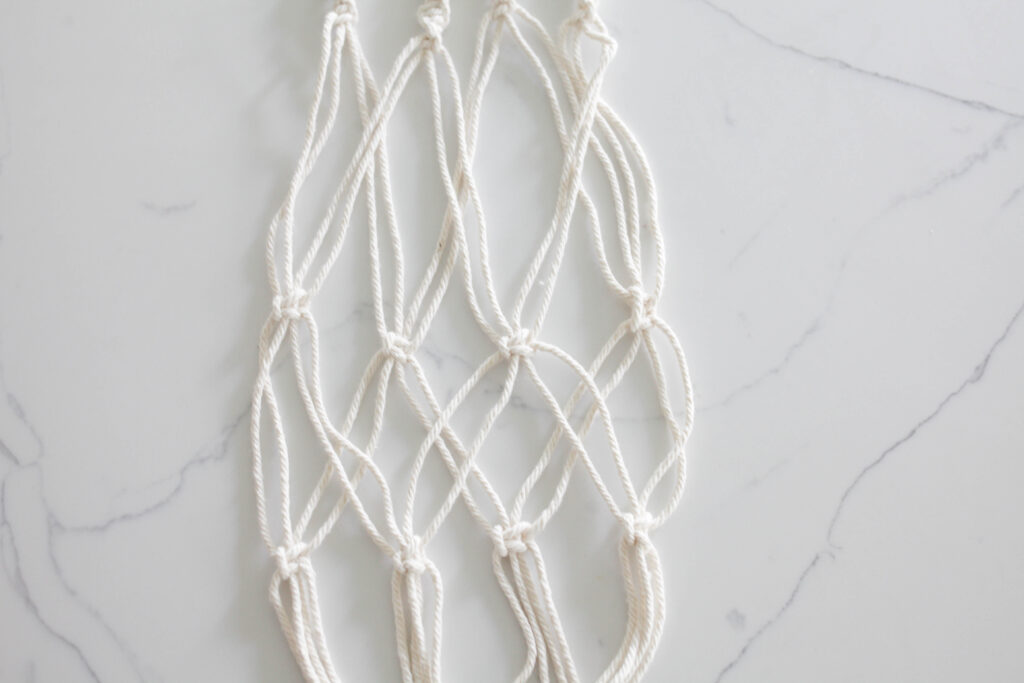
7. Create the basket or nest 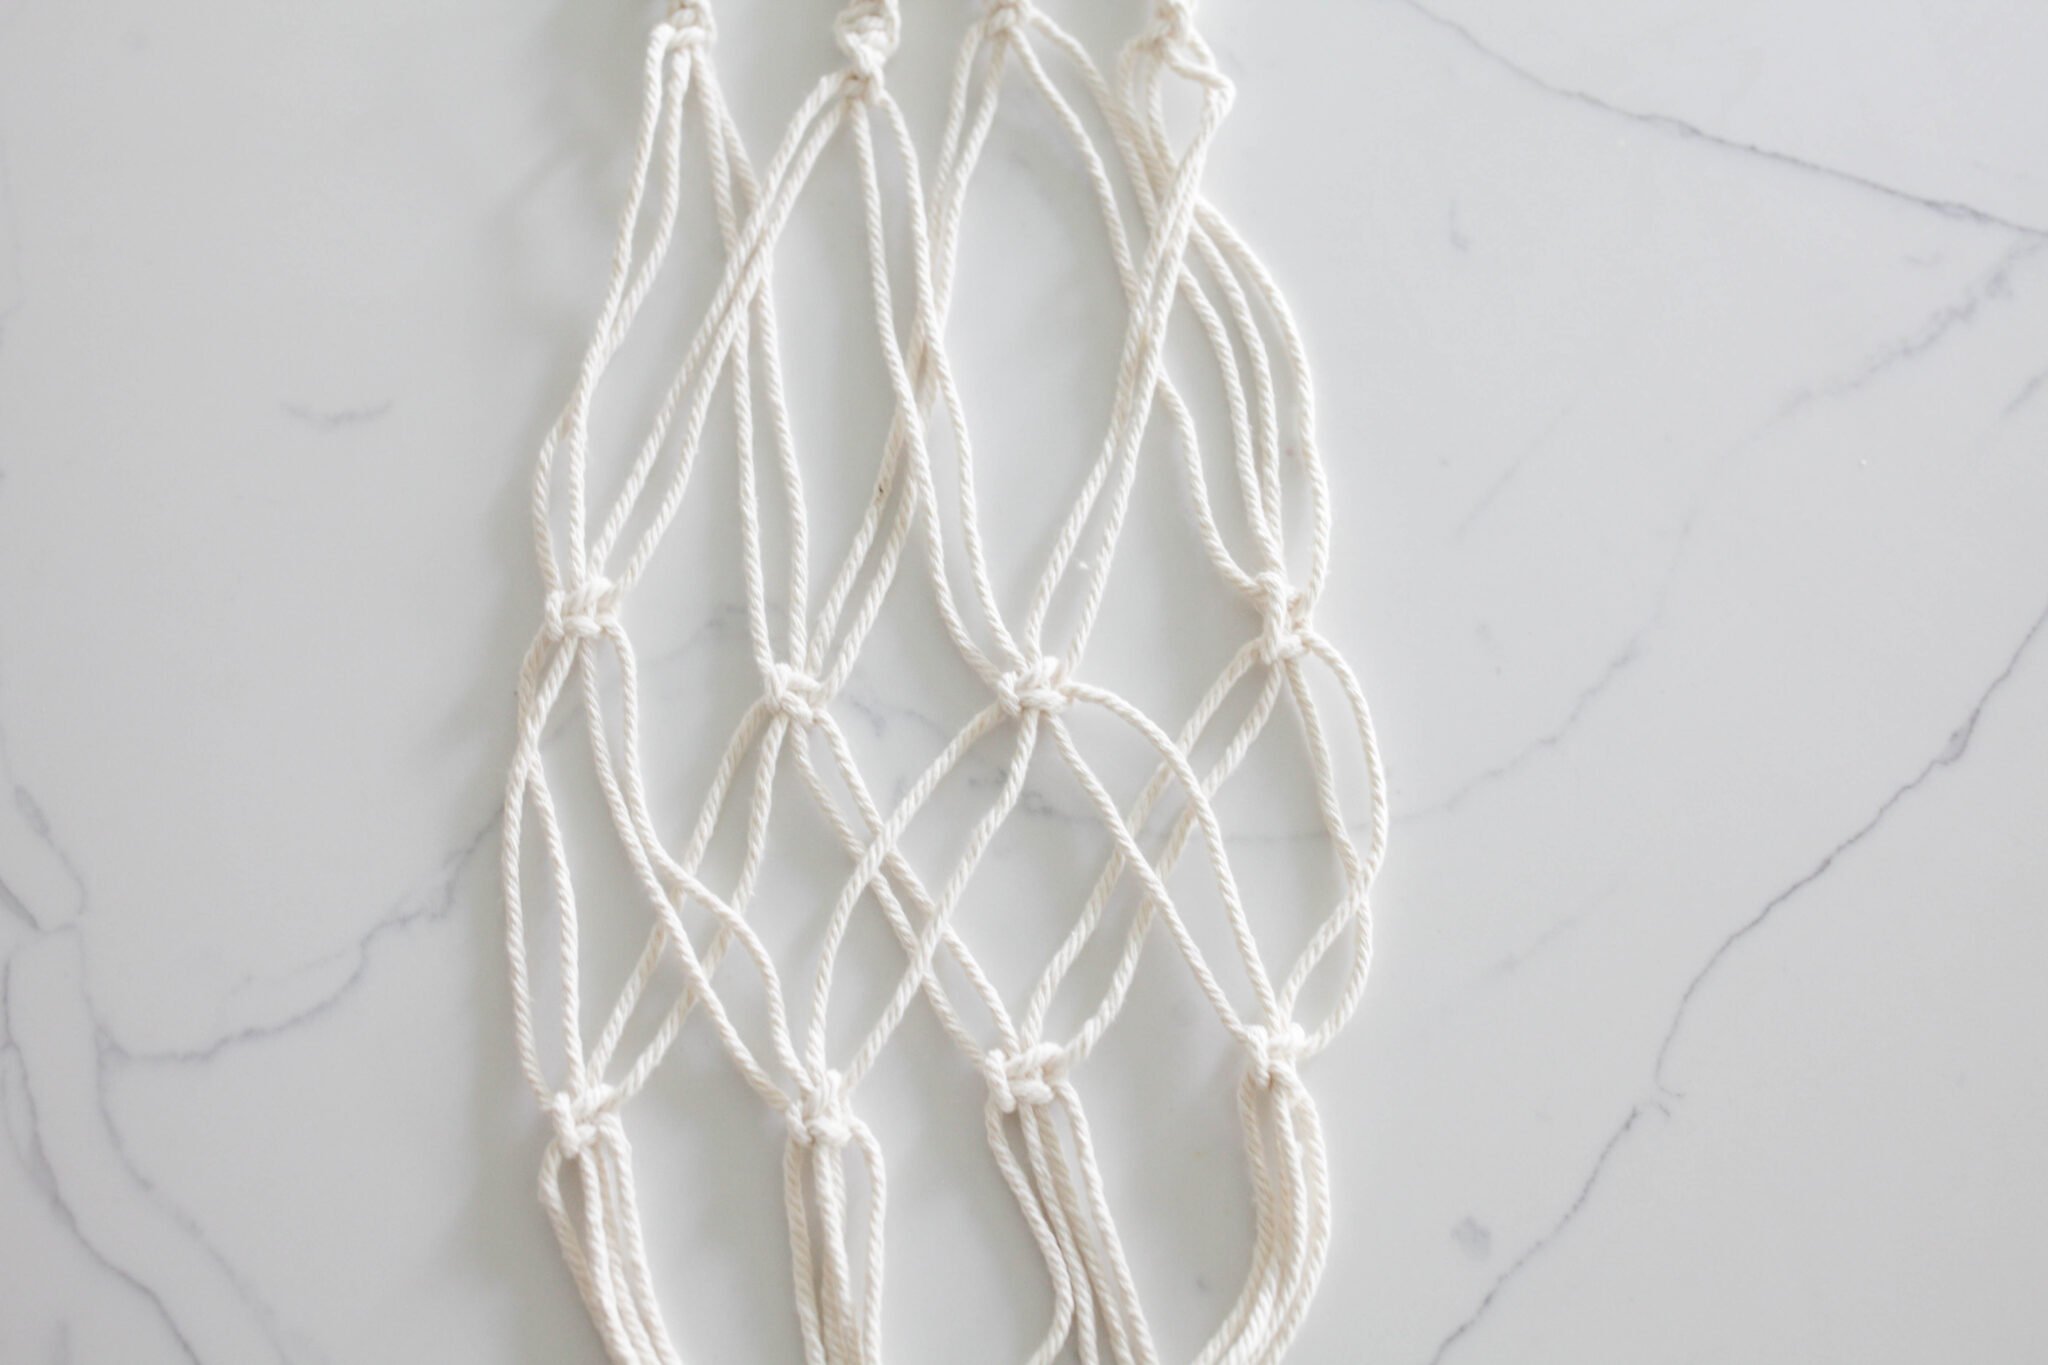
Take 2 pieces from 2 strands next to one another and create a square knot. Keep going until you have 4 square knots.
You'll want to do this sequence again about 3 inches or so below the first set of square knots.
8. End with a gathering knot. 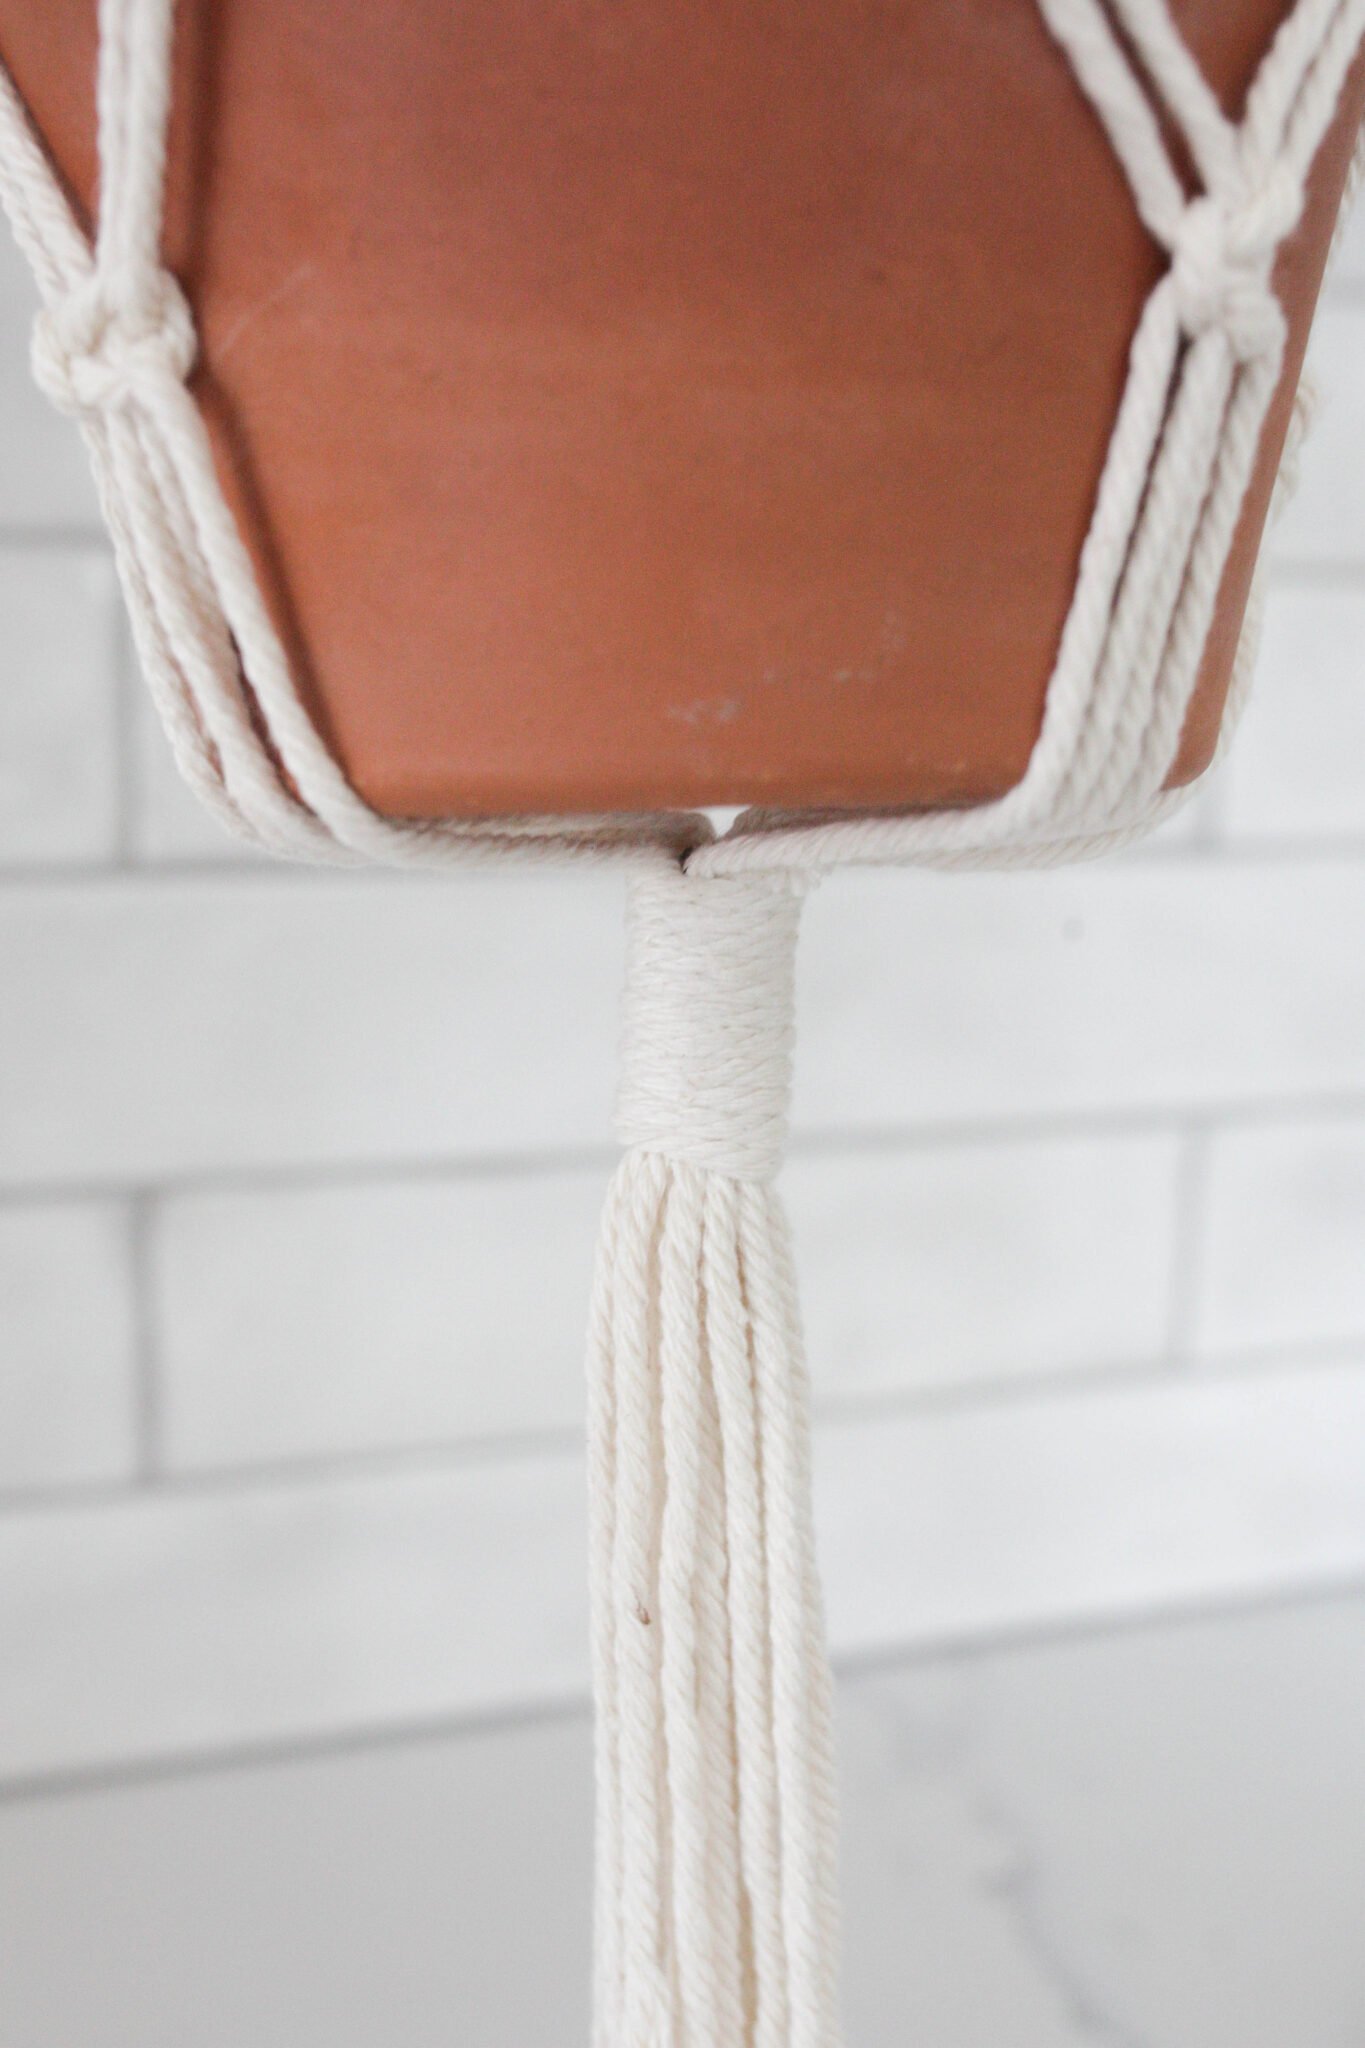
9. Trim off the excess cord to get the length of tassel that you like, add your pot and you're good to go! 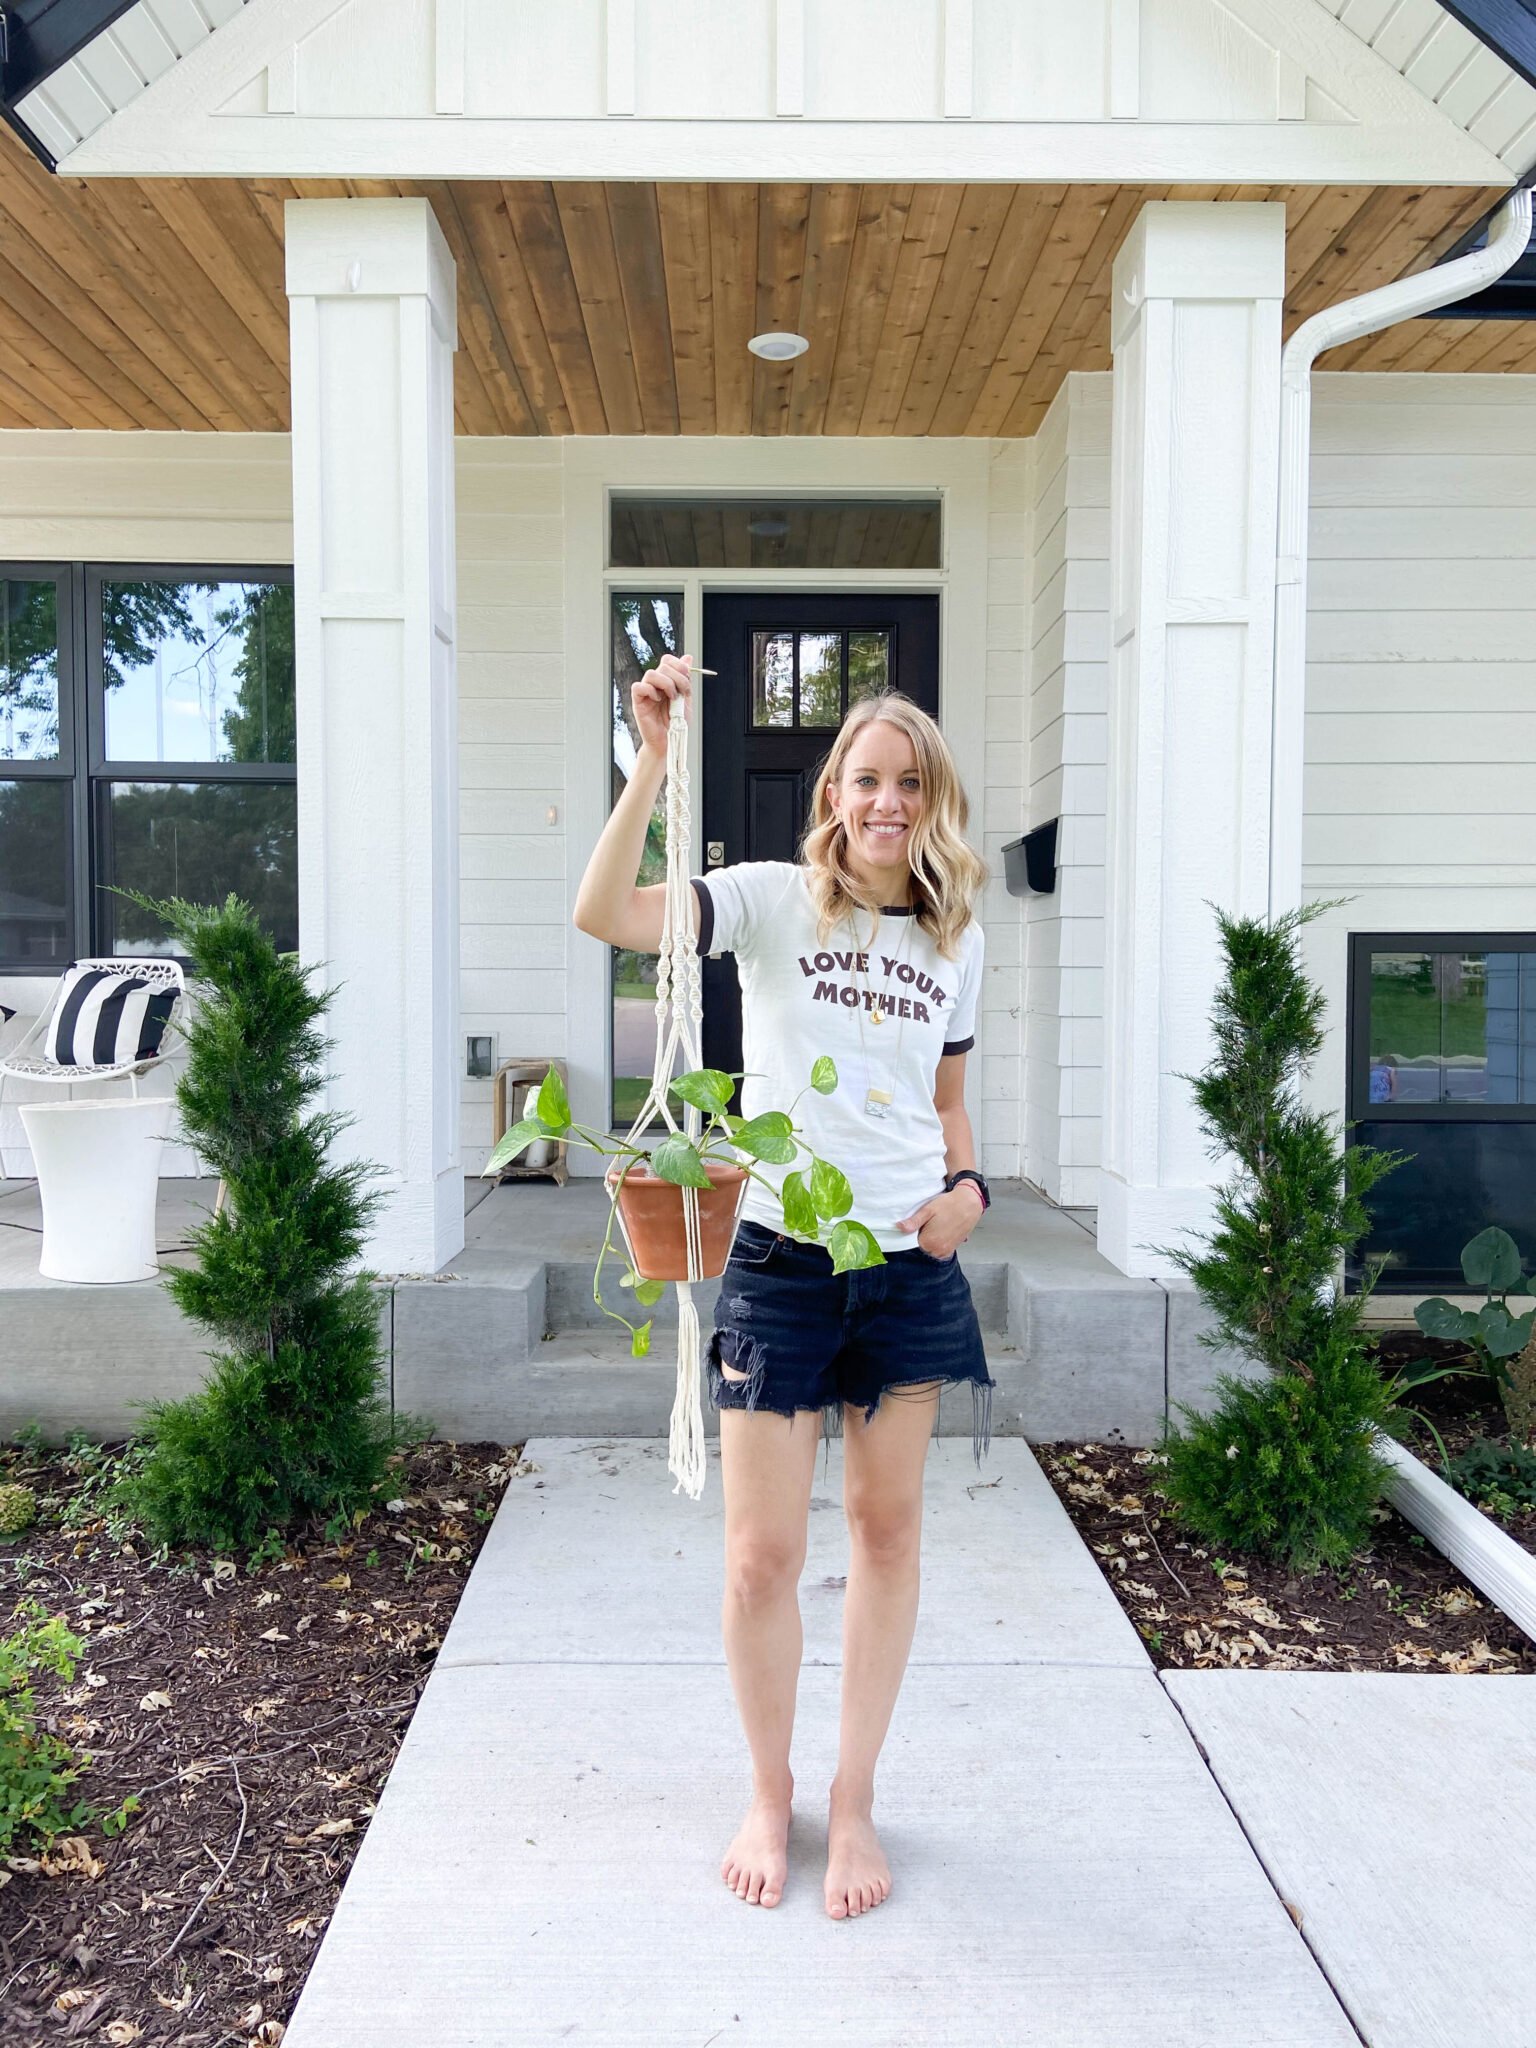
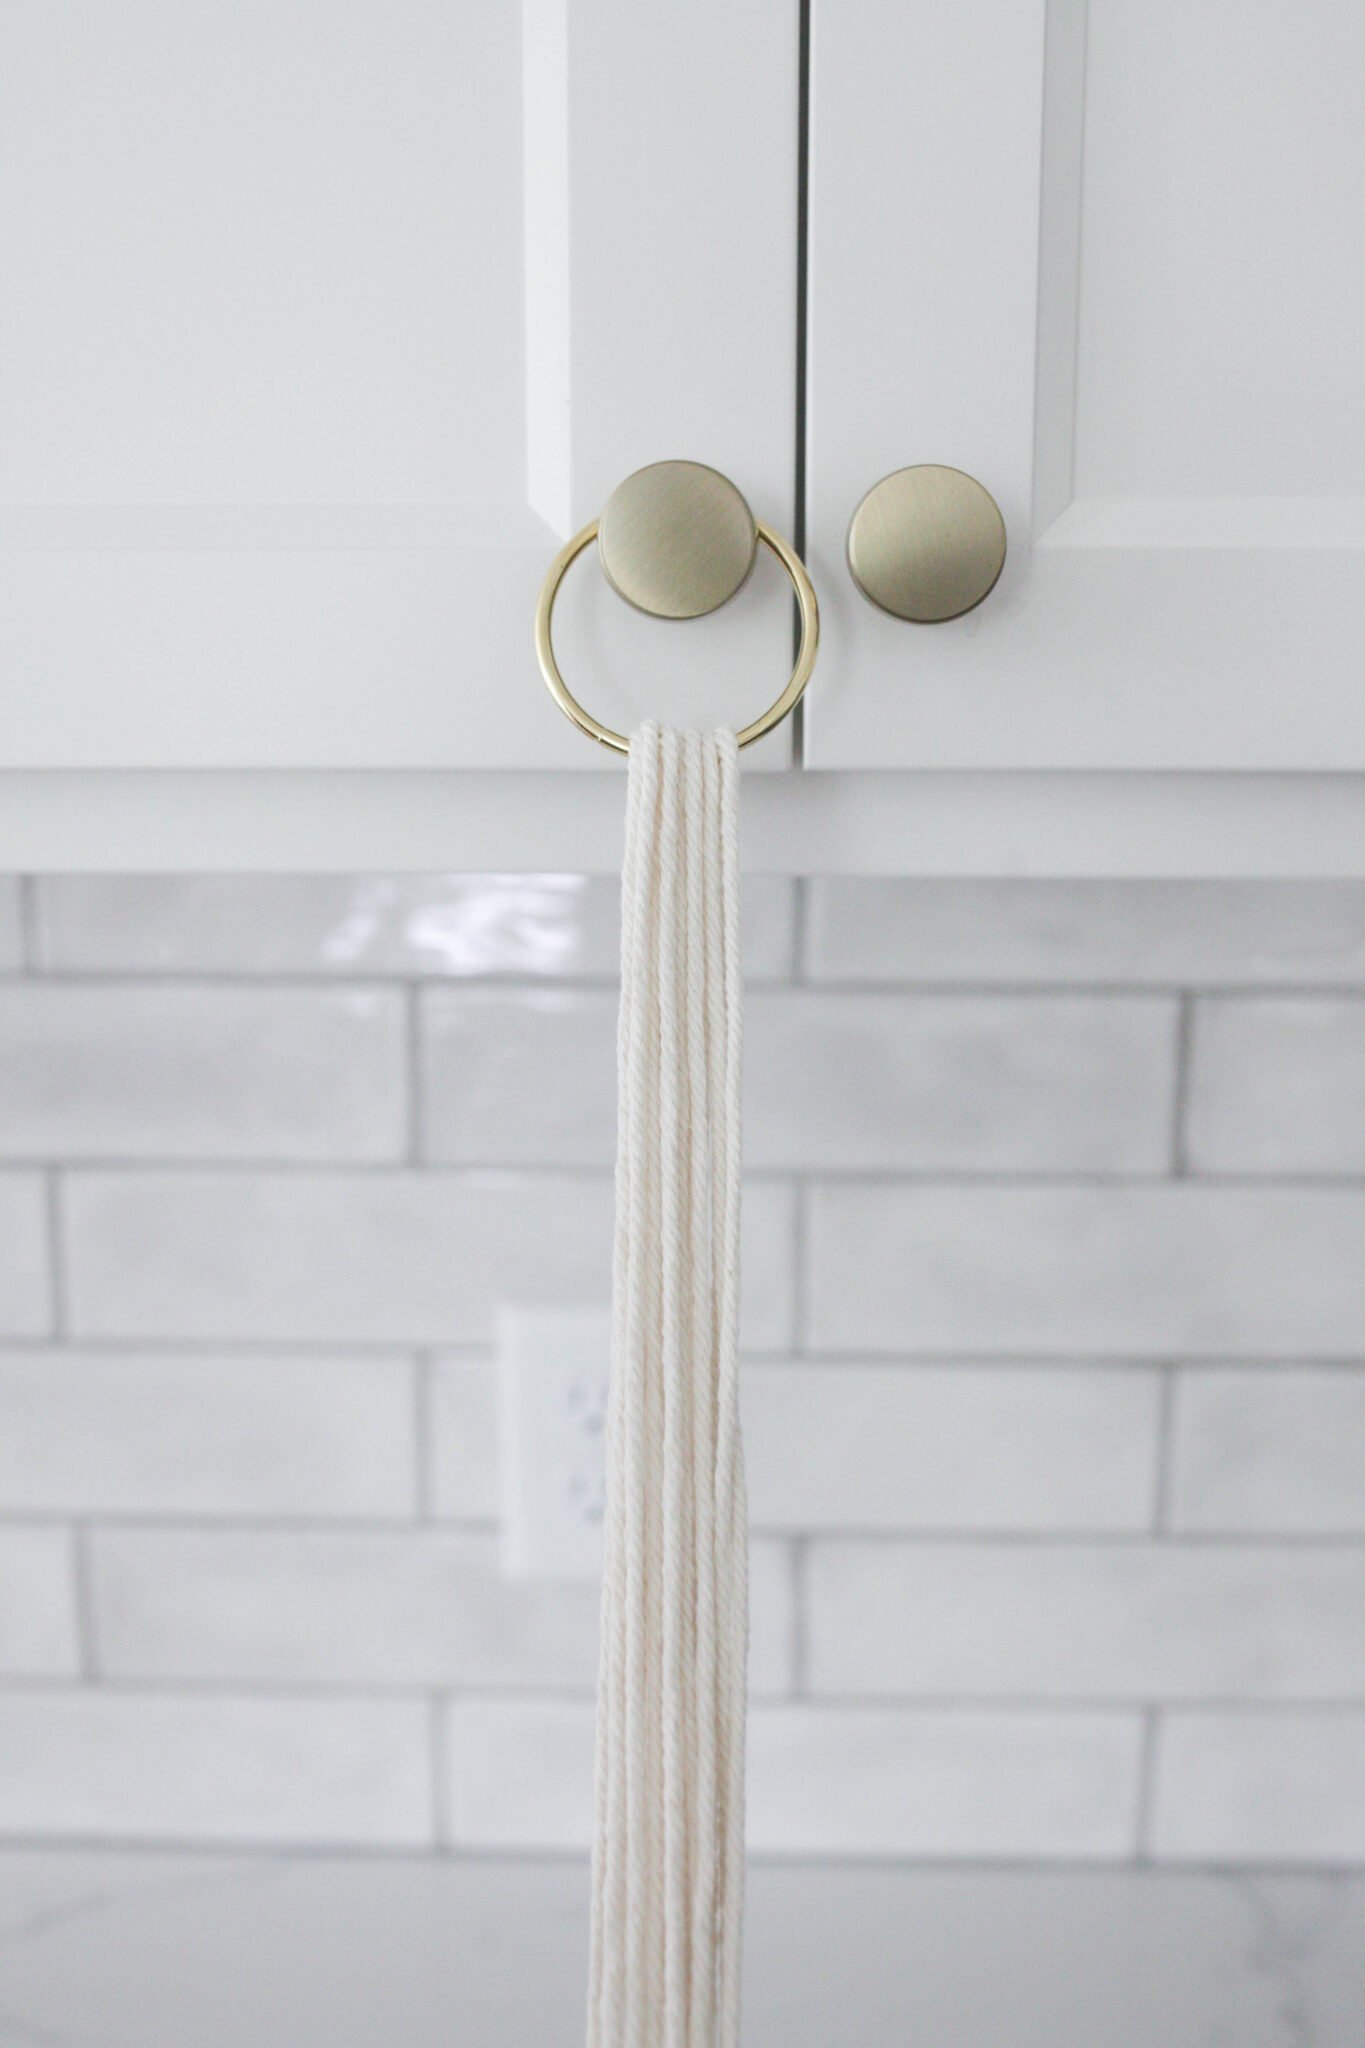
And now, here’s your step by step guide how to make a DIY macrame plant hanger! Start with your ring either hung on a hook or securely taped to a table so you can wiggle and pull it as much as you need.
1. Loop all eight pieces of your 12 foot cord through the ring so they fold in half at the center of the string.
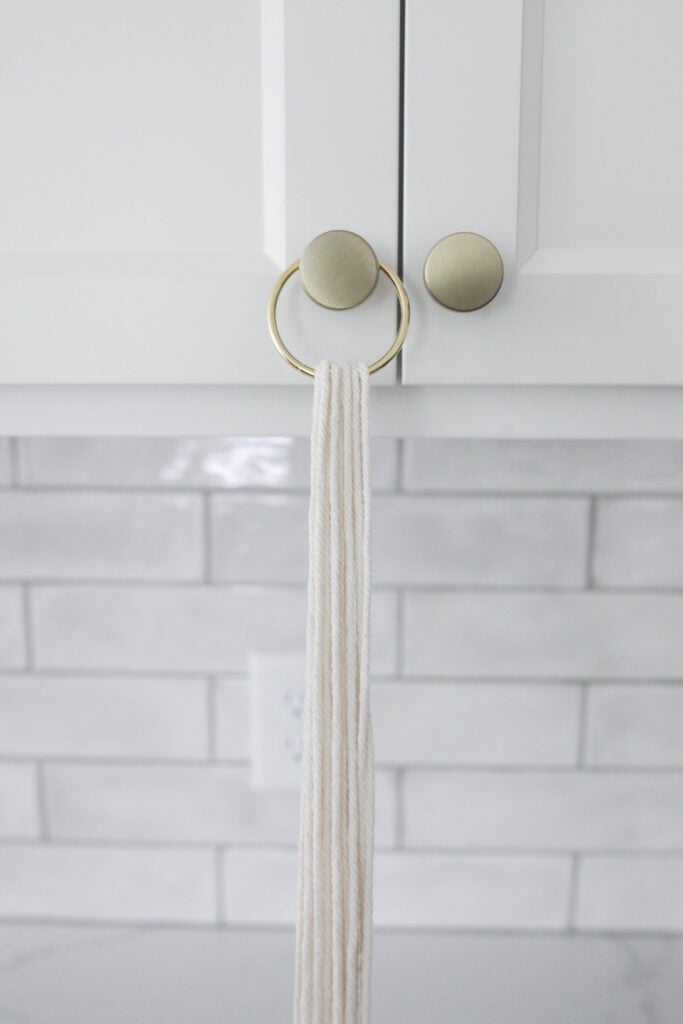
Don’t worry if some of the pieces aren’t exactly even — mine were always a bit uneven!
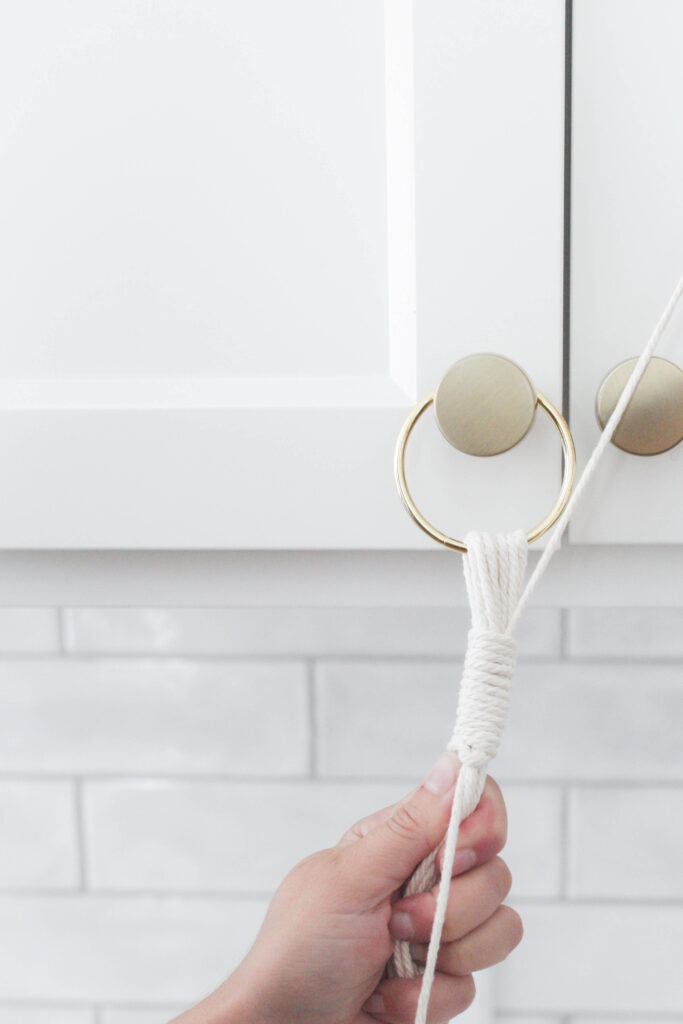
2. Create your gathering knot.
Using one of the separate 4-foot pieces of string, hold one end of the string facing up toward the ring. Use your thumb to hold it against the string hanging from the ring.
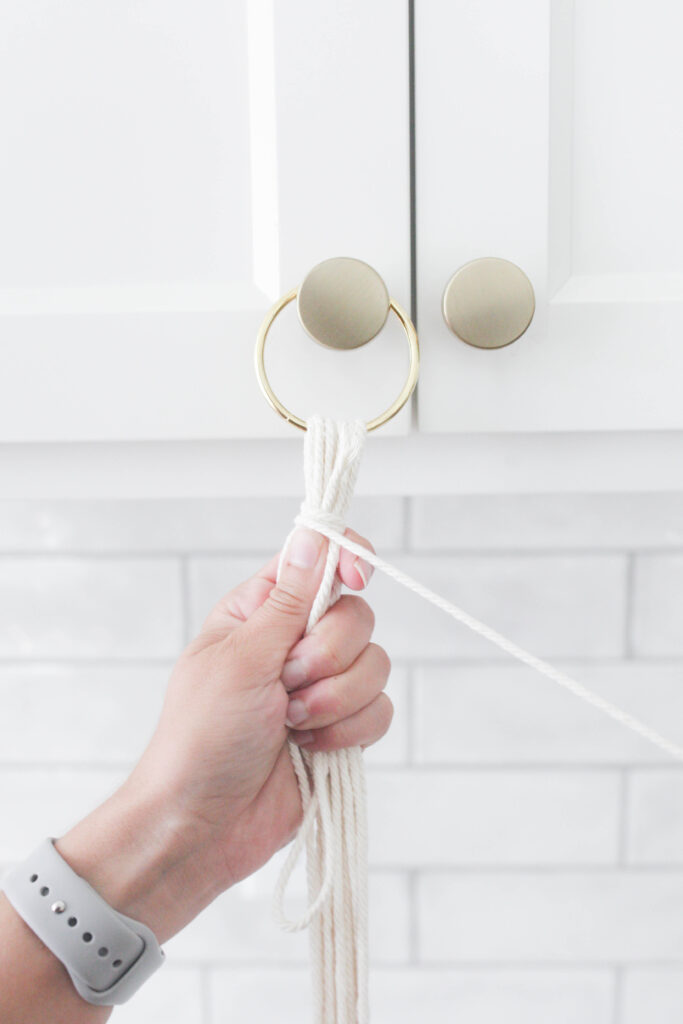
Then create a small “u” shape with the cord leaving a nice long tail.
Wrap the tail tightly around the “u,” making as long of a wrap as you want!
Once you have as long of a wrap as you want, take the end of the long tail you’ve been using to wrap and thread it through the loop.
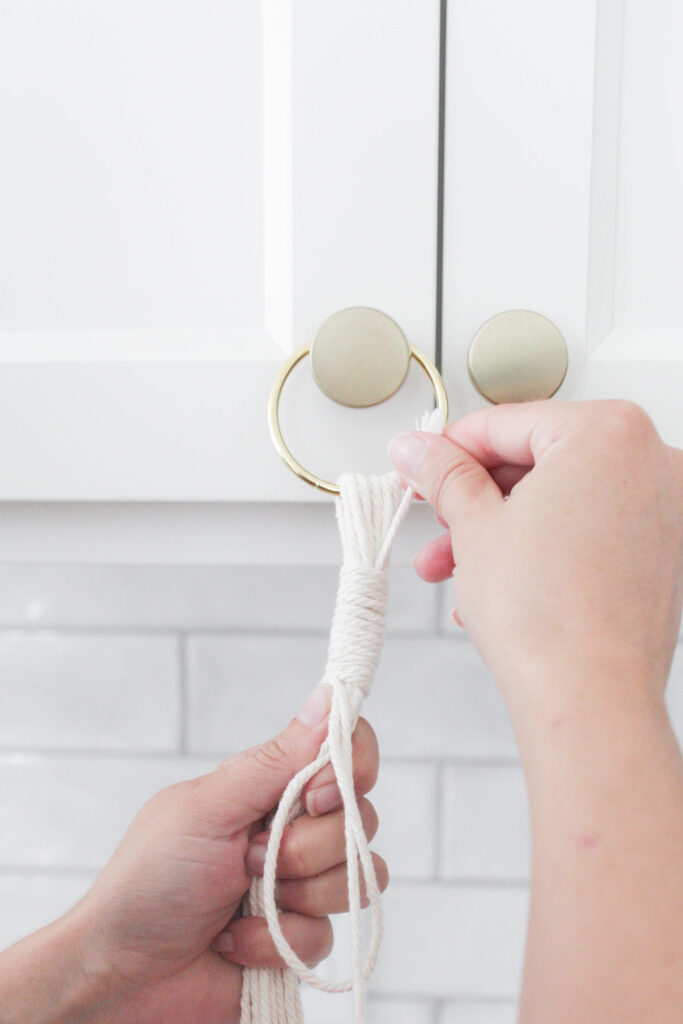
Then take the top short end and pull it tight, cinching up the loop!
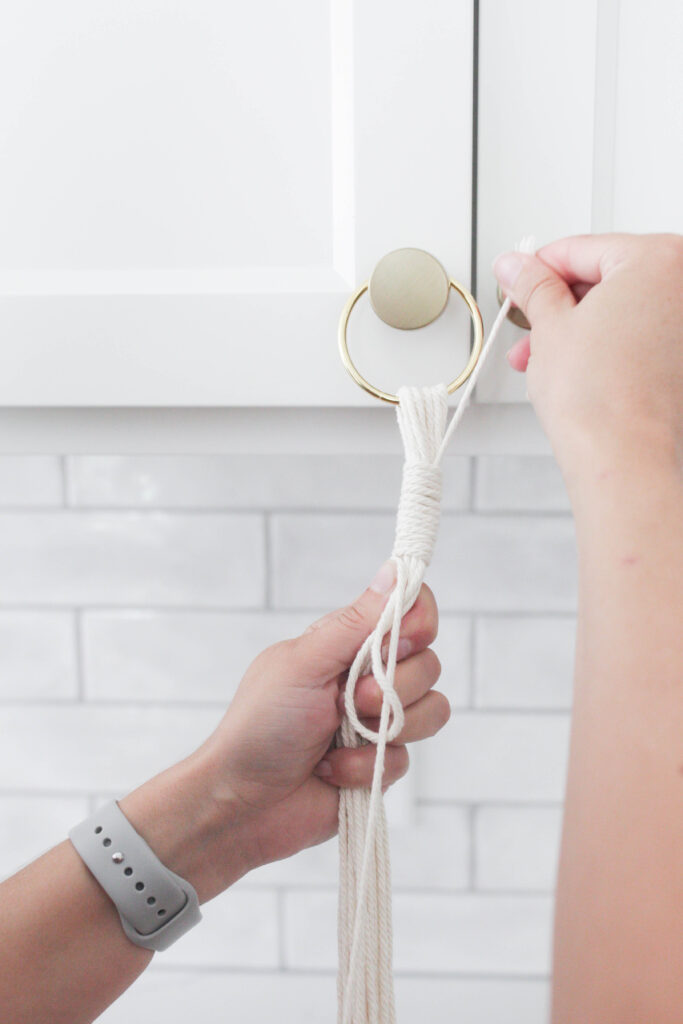
Pull it so it’s nice and tight, so the knot goes behind the wrapped part. Trim off the extra threads and the top is done!
3. Separate the 16 cords into groups of four.
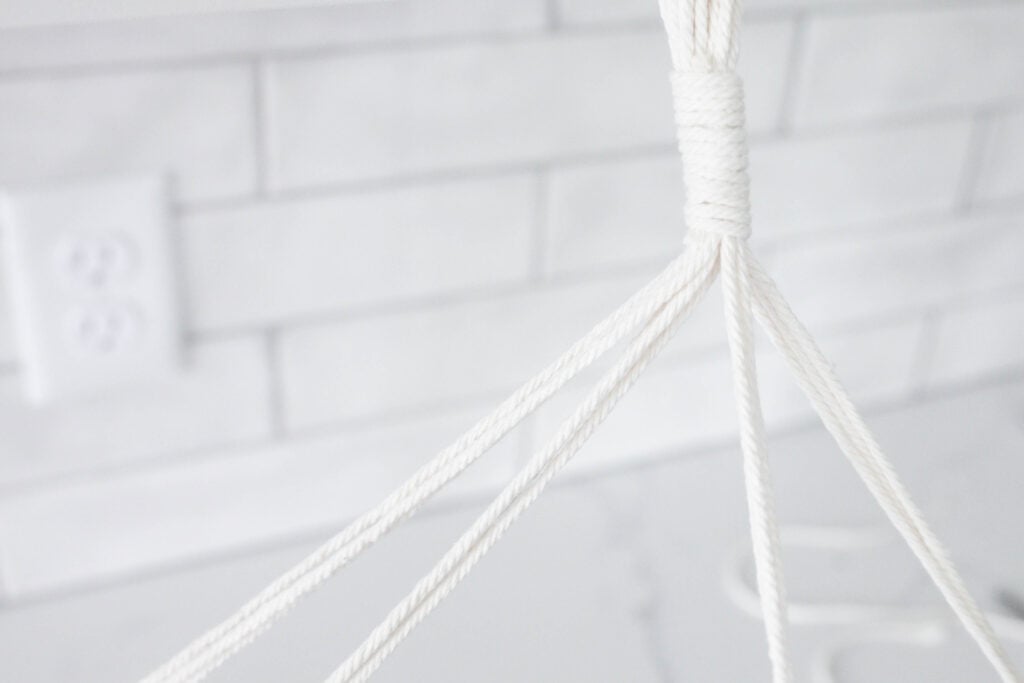
I try to combine cords that lay near one another but don’t worry about this too much!
Time to start knotting! This is a simple macrame pattern even beginners can do.
There are two different types of basic macrame knots that you’ll need to know for this DIY macrame plant hanger. A square knot (which creates a straight line and is actually a very simple knot despite it sounding difficult) and a half knot (which creates a twisted line — a really cool easy macrame look).
I do my best to share a square knot using colored string below. Watching the video may also help understand it. If you have any questions, please let me know!
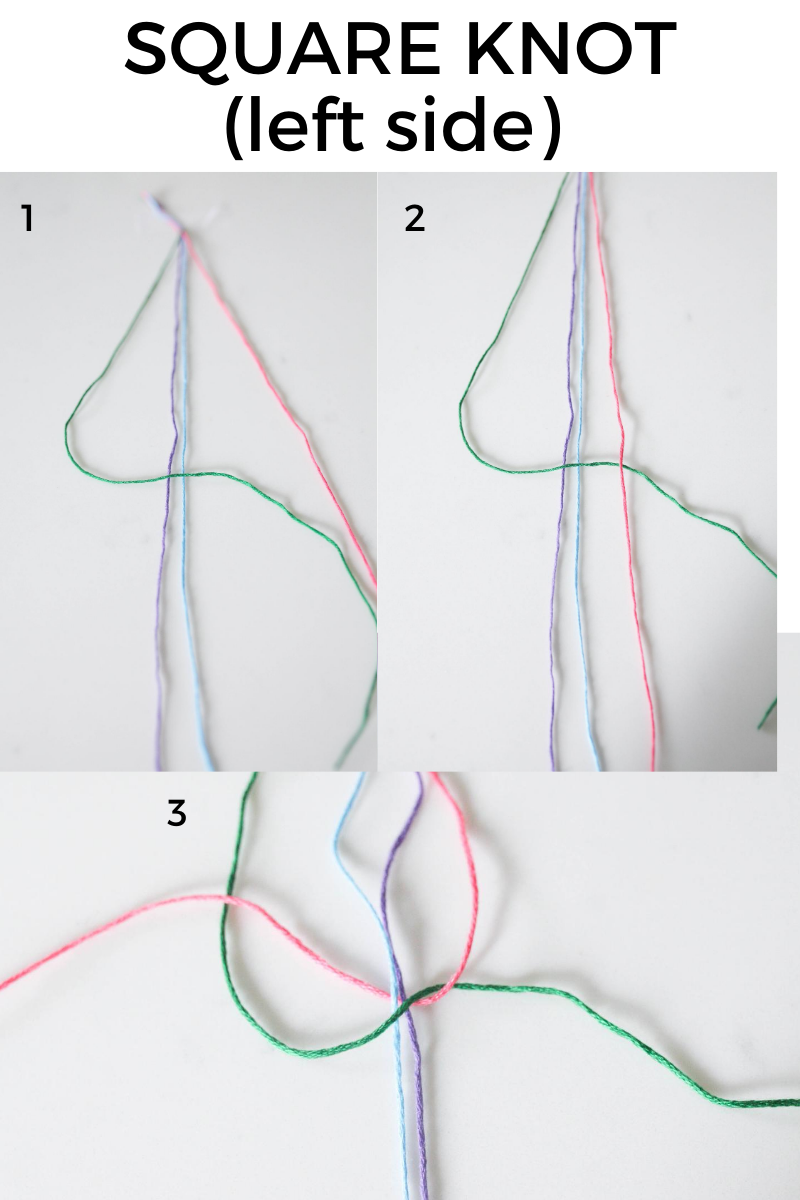
The first knot you’ll make is a square knot. Here’s how to do a square knot for macrame projects.
First we’ll start with the left side.
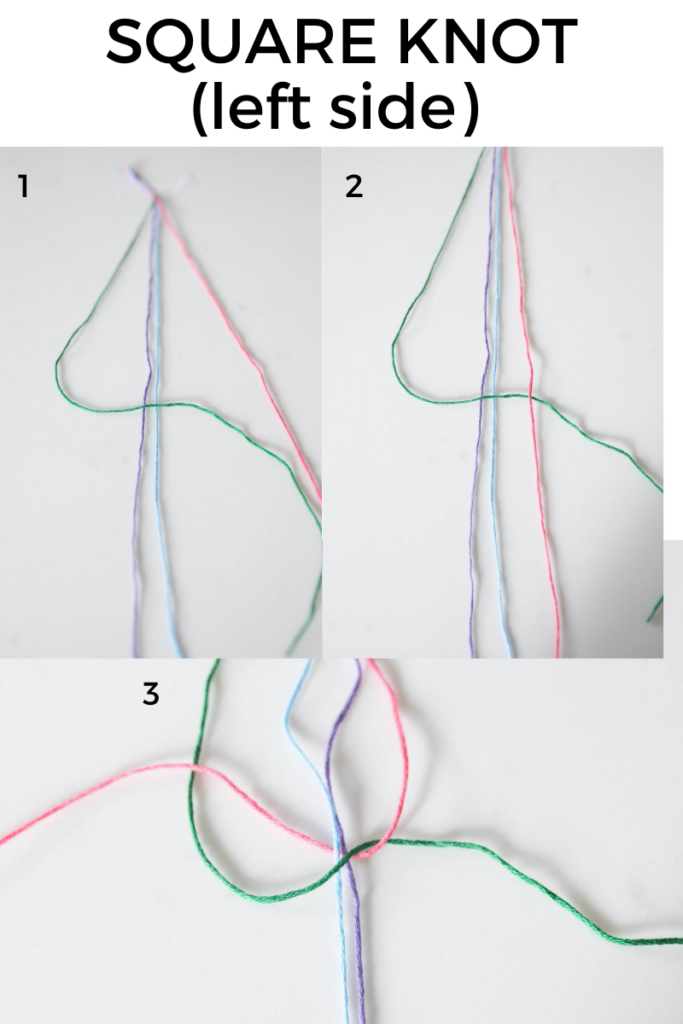
- Bring the left cord (green) over the middle 2 cords (purple and blue).
- Take the far right cord (pink) and bring it over the left cord (green).
- Then tuck the right cord (pink) under the middle 2 cords (purple and blue) and bring it up through the loop on the left side.
Then you’re going to do the same thing but starting with the right cord.
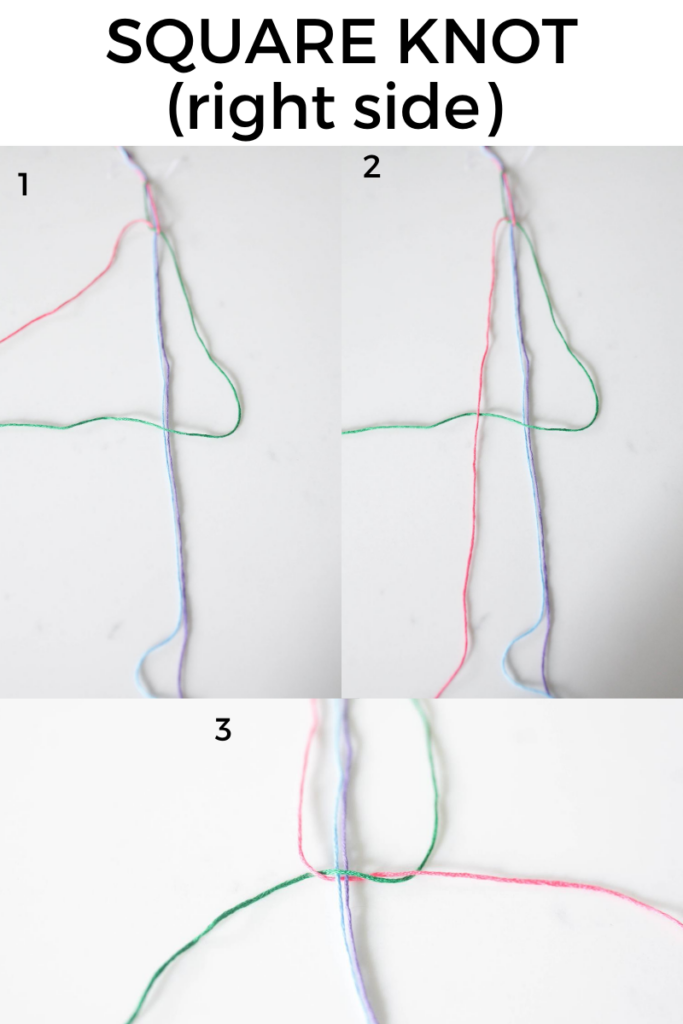
- Bring the right (green) cord over the middle 2 cords (purple and blue).
- Take the far left cord (pink) and bring it over the right cord (green).
- Then tuck the left cord (green) under the middle 2 cords (purple and blue) and bring it up through the loop on the right side.
There you go! A square knot! If you keep going with this you’ll create a straight line.
If you like the twisted look (like me!), you’ll want to do just the first half of the knot (a half square knot).
Here’s how to do a half square knot.
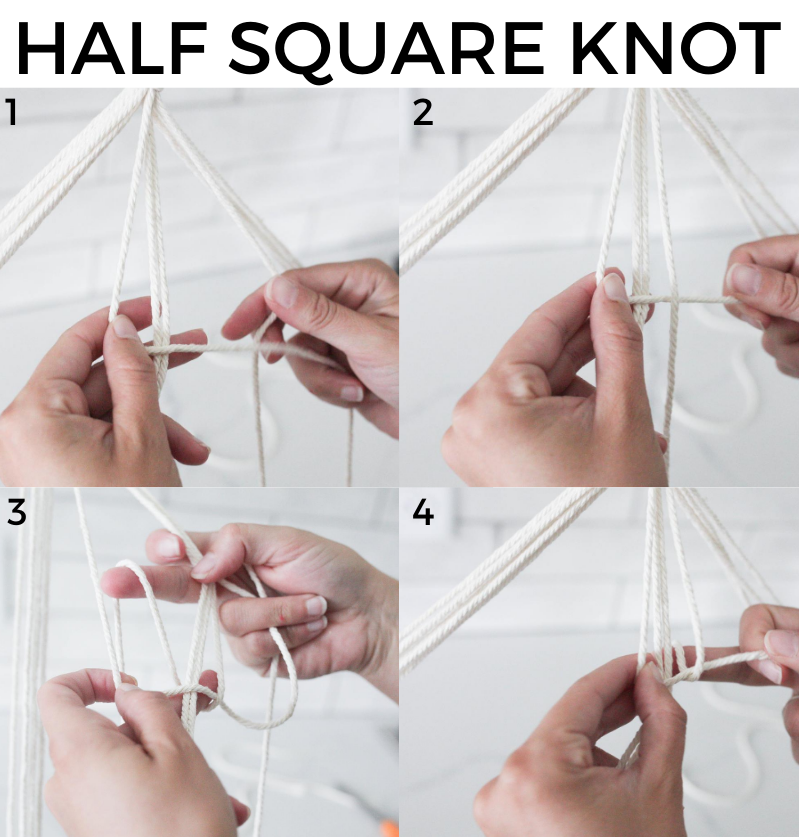
Repeat step 1-4 (starting with either side) and just keep repeating the same side over and over again.
- Bring the left cord over the middle 2 cords.
- Take the far right cord and bring it over the left cord.
- Then tuck it under the middle 2 cords.
- Lastly bring it up through the loop on the left side.
Make your design!
I’m going to share how to make the macrame plant hanger shown here, but once you know the basics, you can make your own design! Macrame can be a really fun creative outlet when you get the hang of it!
This is a pretty simple macrame pattern, but you can get really intricate with it the more you do.
To make mine:
4. Add square knots to the top.
Right under the gathering knot, add square knots, so you’ll have 4 knots total.
5. Create a section of half square knots (to make a spiral)
Then a few inches below the top square knots, do a few knots of half knots. This will create spiral knots and a fun spiral look. (If you want a straight look do full square knots.)
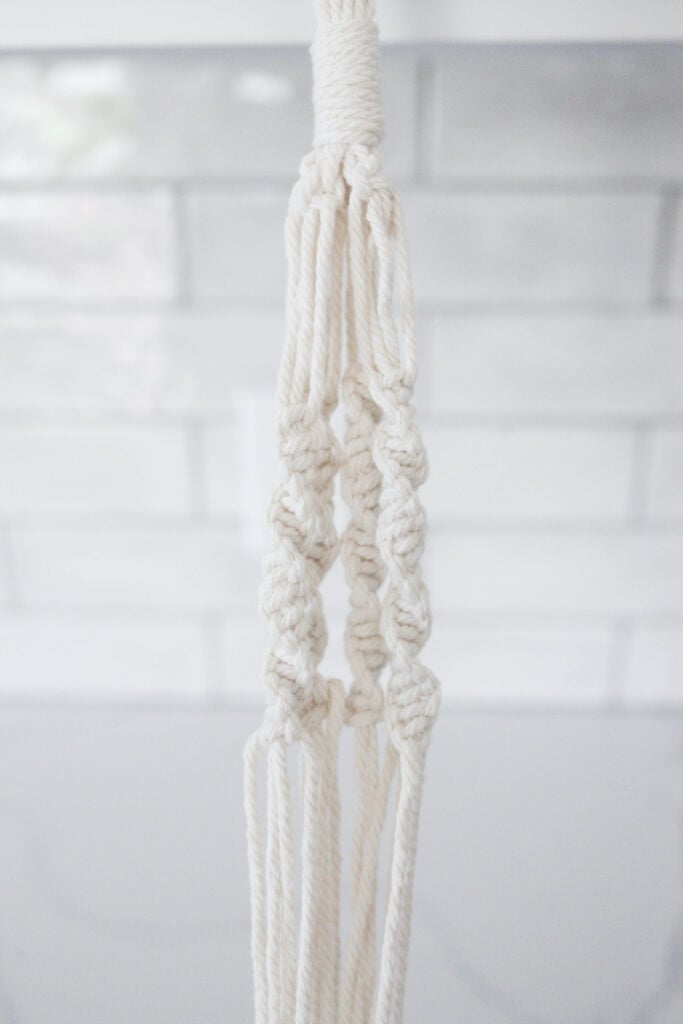
6. Create another section of half square knots (to make a spiral), this time combining sections.
From there, we combined the strands. Take 2 groups next to one another and perform the same half knot you performed above to create another spiral section.
Again, if you want this part straight you’ll want to do the full square knot.

Another thing to note. If you have a large pot you may want to skip combining sections together and wait to do that when you create the basket at the end.
Combining sections together further up makes a smaller hole to insert your pot. Just something to consider when making your macrame plant hanger!

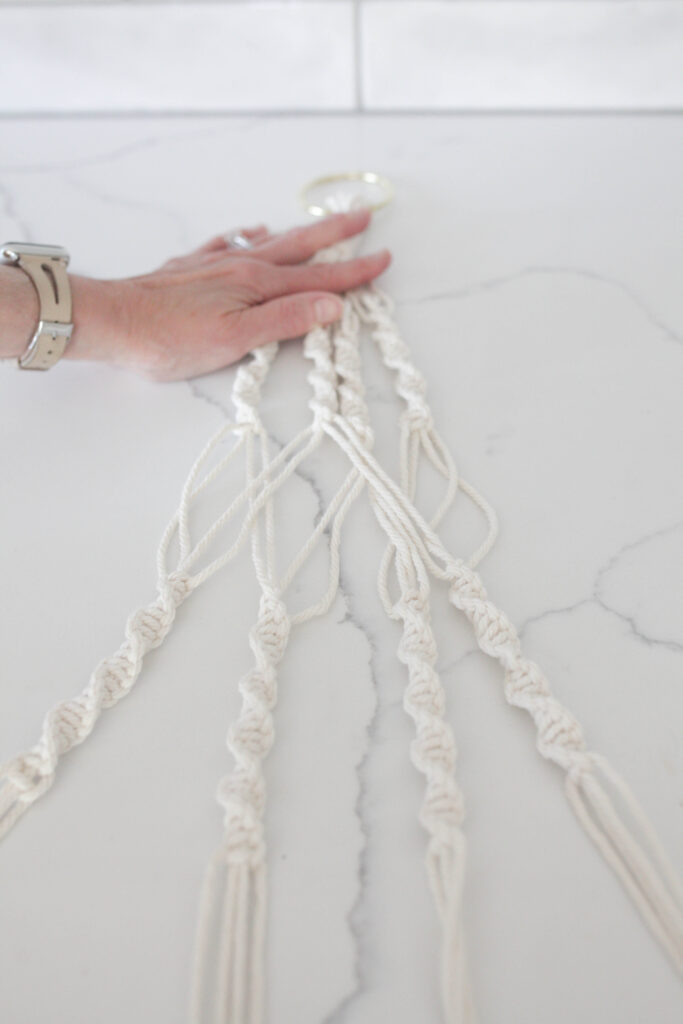
7. Create the basket or nest for your planter.
After you have your second round of spirals, now is the time to make your basket!
You’re going to want to do the exact same thing as above where you combine strands.
Take 2 pieces from 2 strands next to one another and create a square knot. Keep going until you have 4 square knots.
Try to make sure all of the knots line up in the same spot. You can easily move them up or down after you’re done so don’t stress about it too much while you’re doing the square knots.
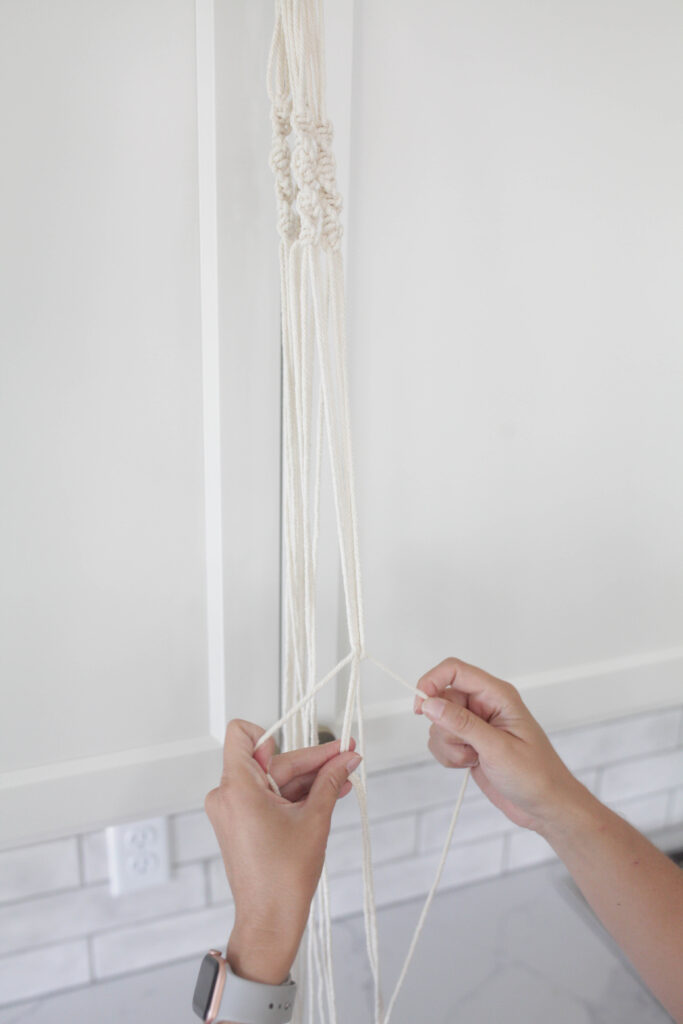
Then, do it all again!
You’ll want to do the next sequence about 3 inches or so below the first set of square knots.
8. End with a gathering knot.
Just like above, the final knot you’ll do is a gathering knot! Follow the exact same instructions as the first one!
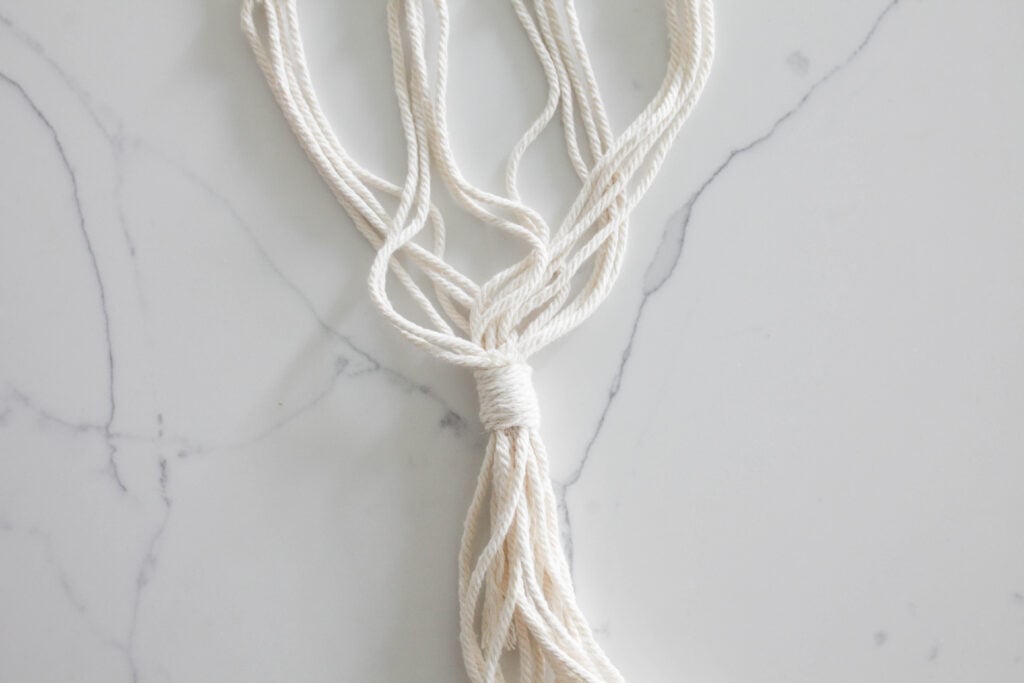

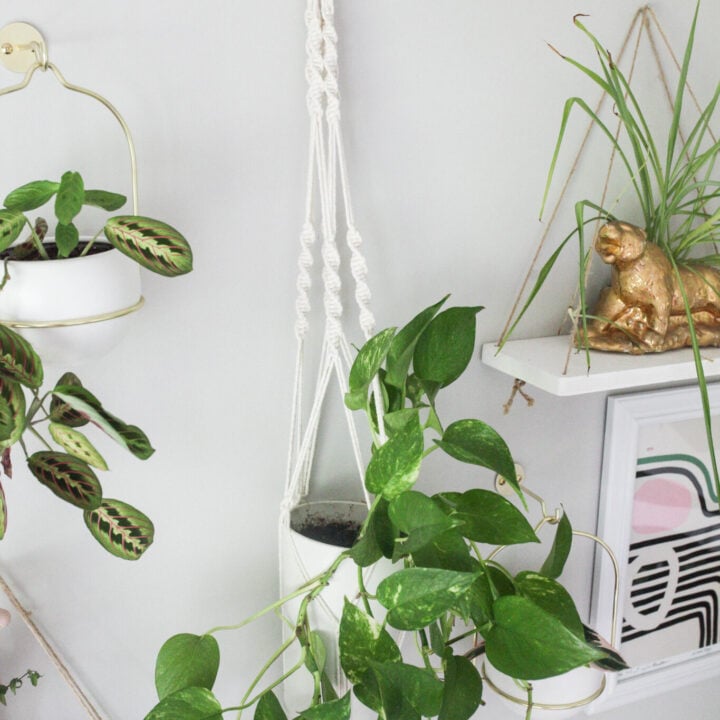
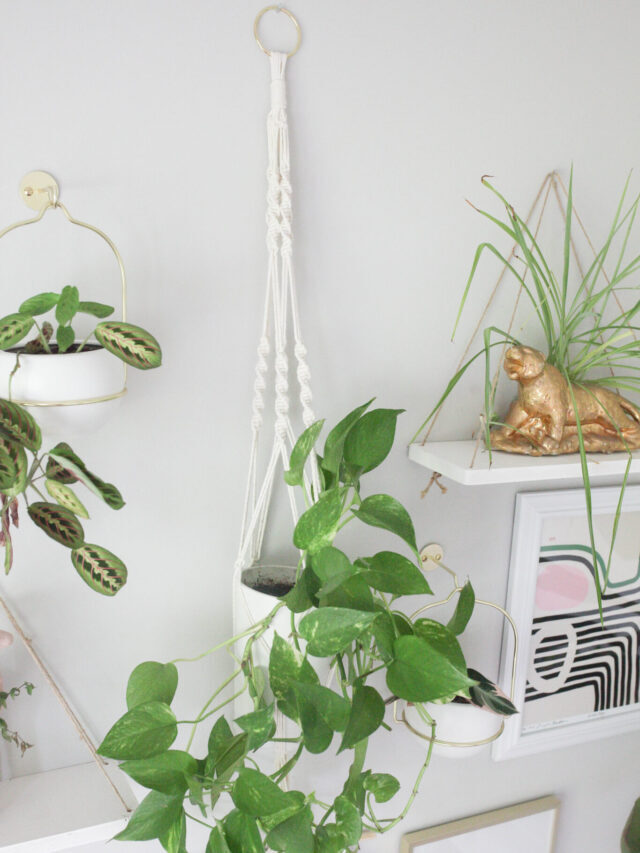
9. Trim off the excess cord to get the length of tassel that you like, add your pot and hang up your new plant hanger!
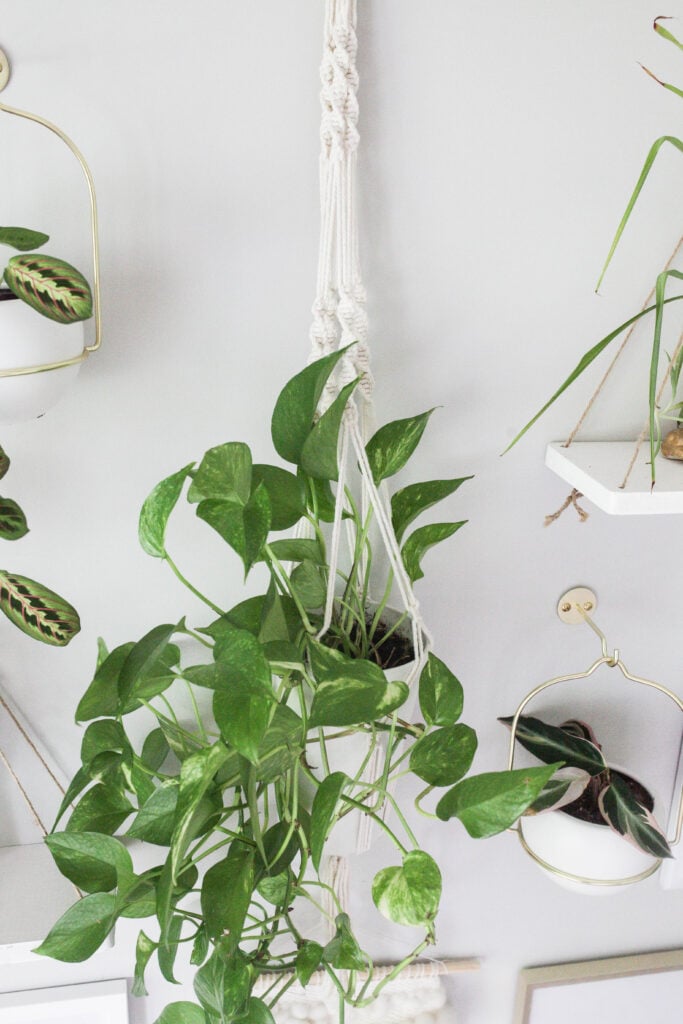
I hung mine from a nail on the wall but you can also hang it from the ceiling using a hook! One thing to note when choosing your pot. Look at the bottom of the pot to see if it has drainage holes. I highly recommend using pots without drainage holes so you don’t have water seeping down your walls when you water it!
I also recommend using a small plant so it’s not too heavy. Some of the best plants are hanging plants like a pothos!
Other Easy Knots
If you’ve got these knots down, here are some more beginner knots. They may be simple but they will give you so much freedom to create exciting designs!
- Half hitch is used to create horizontal or diagonal lines in your project. Learn this knot and its variations to make a ton of patterns.
- Overhand knot is a knot that ties cords together and is probably the easiest knot to do!
- Lark’s head is the knot you need to know to start a project on a wooden dowel, like you would for a wall hanging.
History of Macrame
Experts say macrame could have its root as far back as the 13th century with Arab weavers who knotted excess yarn to make decorative fringe on some garments. It looks a bit like crochet, just on a bigger scale. It’s been pretty popular at various times throughout history, including the Victorian era, when homes were decorated all over the place with macrame items.
I think we most associate macrame with the 1970s, a period when it gained a lot of popularity again. There were macrame clothes, macrame art, macrame curtains, macrame everything!
It’s only just coming back into style again, and I have to say, I can’t get enough! I love that it adds texture to my decor and looks great next to my plants.
Macrame Plant Hanger DIY FAQ
Your first plant hanger will take longer. My first one took about 2 hours. I had to learn the different knots and did some trial and error on our design. The second one took about half that!
I used this macrame cord from Amazon and as mentioned above, I was able to make 3 plant hangers from it! If you like thicker looking macrame plant hangers, get a thicker rope. You can even use jute!
Cotton yarn is good for macrame. The kind of yarn you would typically use for knitting, like wool yarn, isn’t very good for macrame. It stretches too much and the knots pull too tight, making them tiny so you can’t see the pattern.
I used about 36 yards of cord to make the planter in this tutorial. I was able to make 3 hangers out of the 109 yards of cord I bought.
Yes! What I love most about macrame is once you get the hang of the easy knots and different things you can do, you can move on to more difficult knots and the options are endless as to what you can make!
You can make everything from macrame plant hangers to wall hangings and you can always get more advanced with different knots or adding different beads, etc!
Picking an easy project is the best way to get started with macrame if you’ve never done it before. This planter is a great, very forgiving starter project. You can practice square or half square knots and get the basics down.
I definitely recommend following a step-by-step tutorial until you feel confident and have learned as many knots as you want to use. Then you can come up with your own designs!
There’s a variety of ways to hang them. You best bet is to find the stud in your wall to hang it from so it doesn’t pull off the wall. You could also use an S hook to hang them from existing art, curtain rods or even light fixtures!
If you’d like to make this plant hanger into a double plant hanger, make sure you start with double the length of cord. I would NOT recommend this for a beginner — that’s a lot of cord to get tangled up in!
Go through this tutorial; then when you tie your bottom gathering knot, instead of cutting off the excess, start the tutorial again! This will give you two spots for pots, one on top of the other.
If you plan to hang a double planter, make sure your hook and wall can handle the extra weight!
If you have a tiny pot you’d like to hang, it is a very quick easy project to make a mini macrame plant hanger for it. You can use most string, twine or cord you have on hand, as long as it doesn’t stretch a ton.
The tiny plant hanger will follow directions pretty similar to the regular sized hanger above; it’ll just be less intricate. Instead of 8 long cords, use 4 cords and make them more than double the length you want the planter.
Hang the four cords through a ring, so you are working with 8 strands of equal length. Use a gathering knot to secure it.
For the most basic plant hanger, just use overhand knots. I think these are the most basic knots, the easy kind you think of when someone tells you to tie a knot in a piece of string. You can also use square knots like I did in the tutorial above to make the basket for the plant pot.
Separate the 8 strands into pairs. Tie one overhand knot into each pair at the spot you want your pot to hang. Now take one string from each knot and pair it with the string next to it. Tie those pairs with an overhand knot. Do this at least one more time.
When you’ve tied three sets of knots, you should have diamond shapes that form a sort of net. You can do this more depending on the size of your pot, for instance, if you’re making a macrame mason jar holder and need it to be a taller basket.
When you have the desired size “basket” for your pot, take all 8 cords and tie them in one overhand knot.
It’s a great project for beginners because it doesn’t take much time and it’s hard to mess up. But you can get as fancy as you want using your new macrame knowledge!
And there you go! An easy macrame plant hanger diy tutorial plus more ideas for your next project! I hope this inspires you to make your own macramé plant hanger to hold a boring pot or make room for another plant in your home!
For more do-it-yourself fun, be sure to check out my tutorial on how to make a balloon garland! It’s so easy for such a big impact.
I thought the directions and accompanying video were very good and easy to follow. I hadn’t made a macrame plant hanger since the late 1970’s but I picked up on making the knots very quickly. The only suggestion would be to add the number of knots in the half squares and the lengths between the groups of knots. I think my hanger ended up being shorter than it should have because I didn’t make the same number of knots or have the distance between them like you did. I understand the pattern can be altered for a longer or shorter hanger, but first time macrame-ists may find it helpful. 😊
Thank you so much for the sweet note and the helpful suggestion. I’m sure your hanger turned out beautiful!
What about the two leftover 4 foot cords?
The 4 foot cords are used to make the gathering knot at the beginning and end of the hanger!
I am pondering trying macrame out. This would be a great item to make.
How long would this one be?
It all depends on how much space you leave between knots! It can really be as long or as short as you want